Do you dream of bringing to the table a dish of orecchiette made with your own hands, smelling of tradition and tasting of Puglia? Imagine the satisfaction of seeing your loved ones enjoy fresh pasta, perfectly rough, capable of embracing every drop of sauce. But does the idea of kneading and "dragging" scare you? Do you fear they won't turn out well, that they'll stick, or that they won't have the right shape, ending up wasting precious time and ingredients?
Make yourself comfortable, because your anxiety is over. Here you won't just find a list of ingredients, but the definitive guide, full of grandma's tricks and tips, to prepare the best homemade Orecchiette of your life. Success is guaranteed, my word!
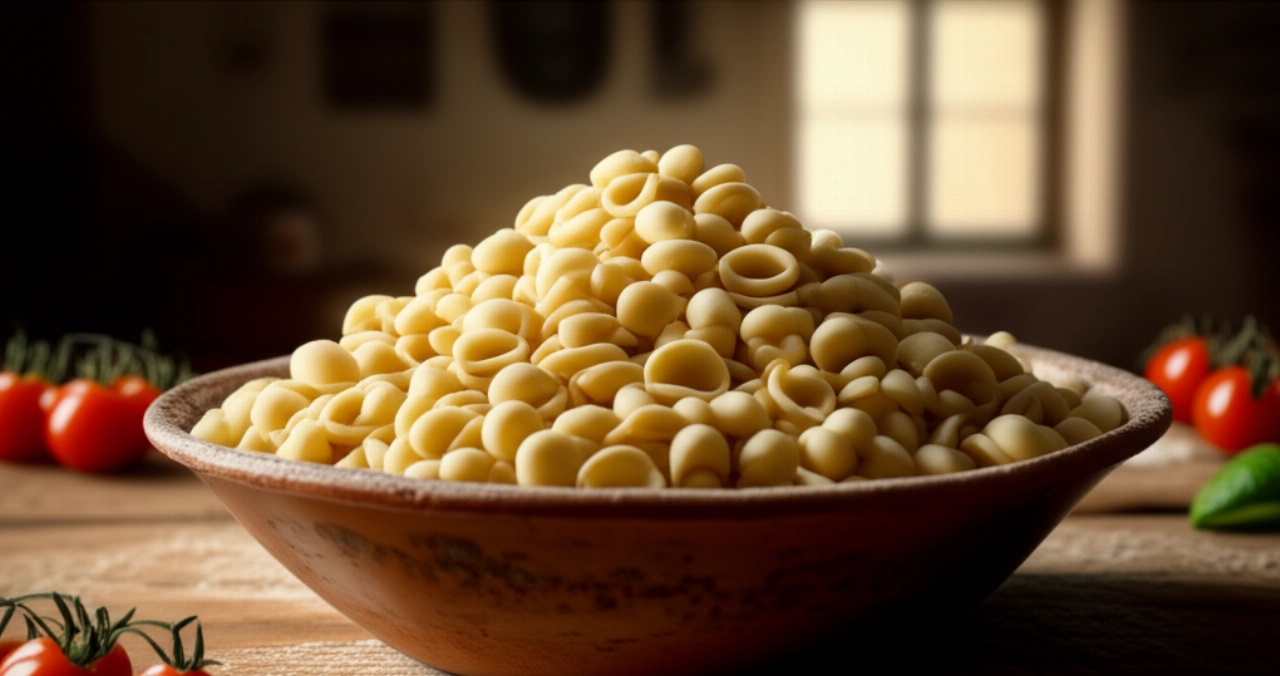
The Secret to Perfect Orecchiette: Infallible Shape and Consistency
The unique angle of this recipe is the PERFECTION OF SHAPE AND CONSISTENCY. My promise is: I will guide you step by step to create orecchiette with the perfect shape and ideal consistency, which embrace the sauce like no other pasta, without fear of making mistakes or wasting ingredients. Forget soft orecchiette or those that break: with my tips, you will have a tenacious and flavorful pasta, just as Puglian tradition dictates.
Ingredients for Homemade Orecchiette: The Choice That Makes the Difference
For an impeccable result, the quality of the ingredients is fundamental. It's not just about quantity, but the "why" behind each choice. Here's what you'll need and why:
- Durum wheat re-milled semolina: This is the main ingredient, not 00 flour! Re-milled semolina, more "granular" and rich in gluten, gives orecchiette that tenacious and porous consistency that allows the sauce to adhere perfectly. It's the secret to pasta that holds its shape and doesn't overcook.
- Lukewarm water: Not cold, not boiling. Lukewarm water (about 30-35°C) helps the semolina absorb better and develop gluten optimally, making the dough more elastic and easier to work with.
- Fine salt: A pinch is enough to enhance the pasta's flavor. Don't overdo it, salt serves to balance, not to dominate.
These are the basics. Three simple ingredients, but their quality and how we use them will make all the difference.

The 3 Common Mistakes in Preparing Orecchiette (and How to Avoid Them)
Many get discouraged thinking that making orecchiette is difficult. Often, however, the mistakes are few and easily avoidable. I'll reveal the most common ones, so you can avoid them and go straight to success:
- Dough too hard or too soft: If the dough is too hard, it will be difficult to "drag" and the orecchiette will break. If it's too soft, it will stick and lose its shape. The secret is to add water gradually, until you get an elastic, smooth, and non-sticky dough. It should feel "alive" under your hands.
- Not letting the dough rest: After kneading, haste is the enemy of perfection. The dough needs to rest, covered, for at least 30 minutes. This allows the gluten to relax, making the pasta more elastic and easier to work with, and the orecchiette will better maintain their shape during cooking.
- Wrong "dragging" technique or lack of practice: This is the most feared step. Don't worry if the first ones aren't perfect. The mistake is not understanding the right movement. I'll show you how to use a dull knife or your thumb to create the perfect concavity, the one that "collects" the sauce. Practice makes perfect, but with my guide, you'll be on the right track right away!
Grandma's Magic Touch: The Secret to Perfect Orecchiette
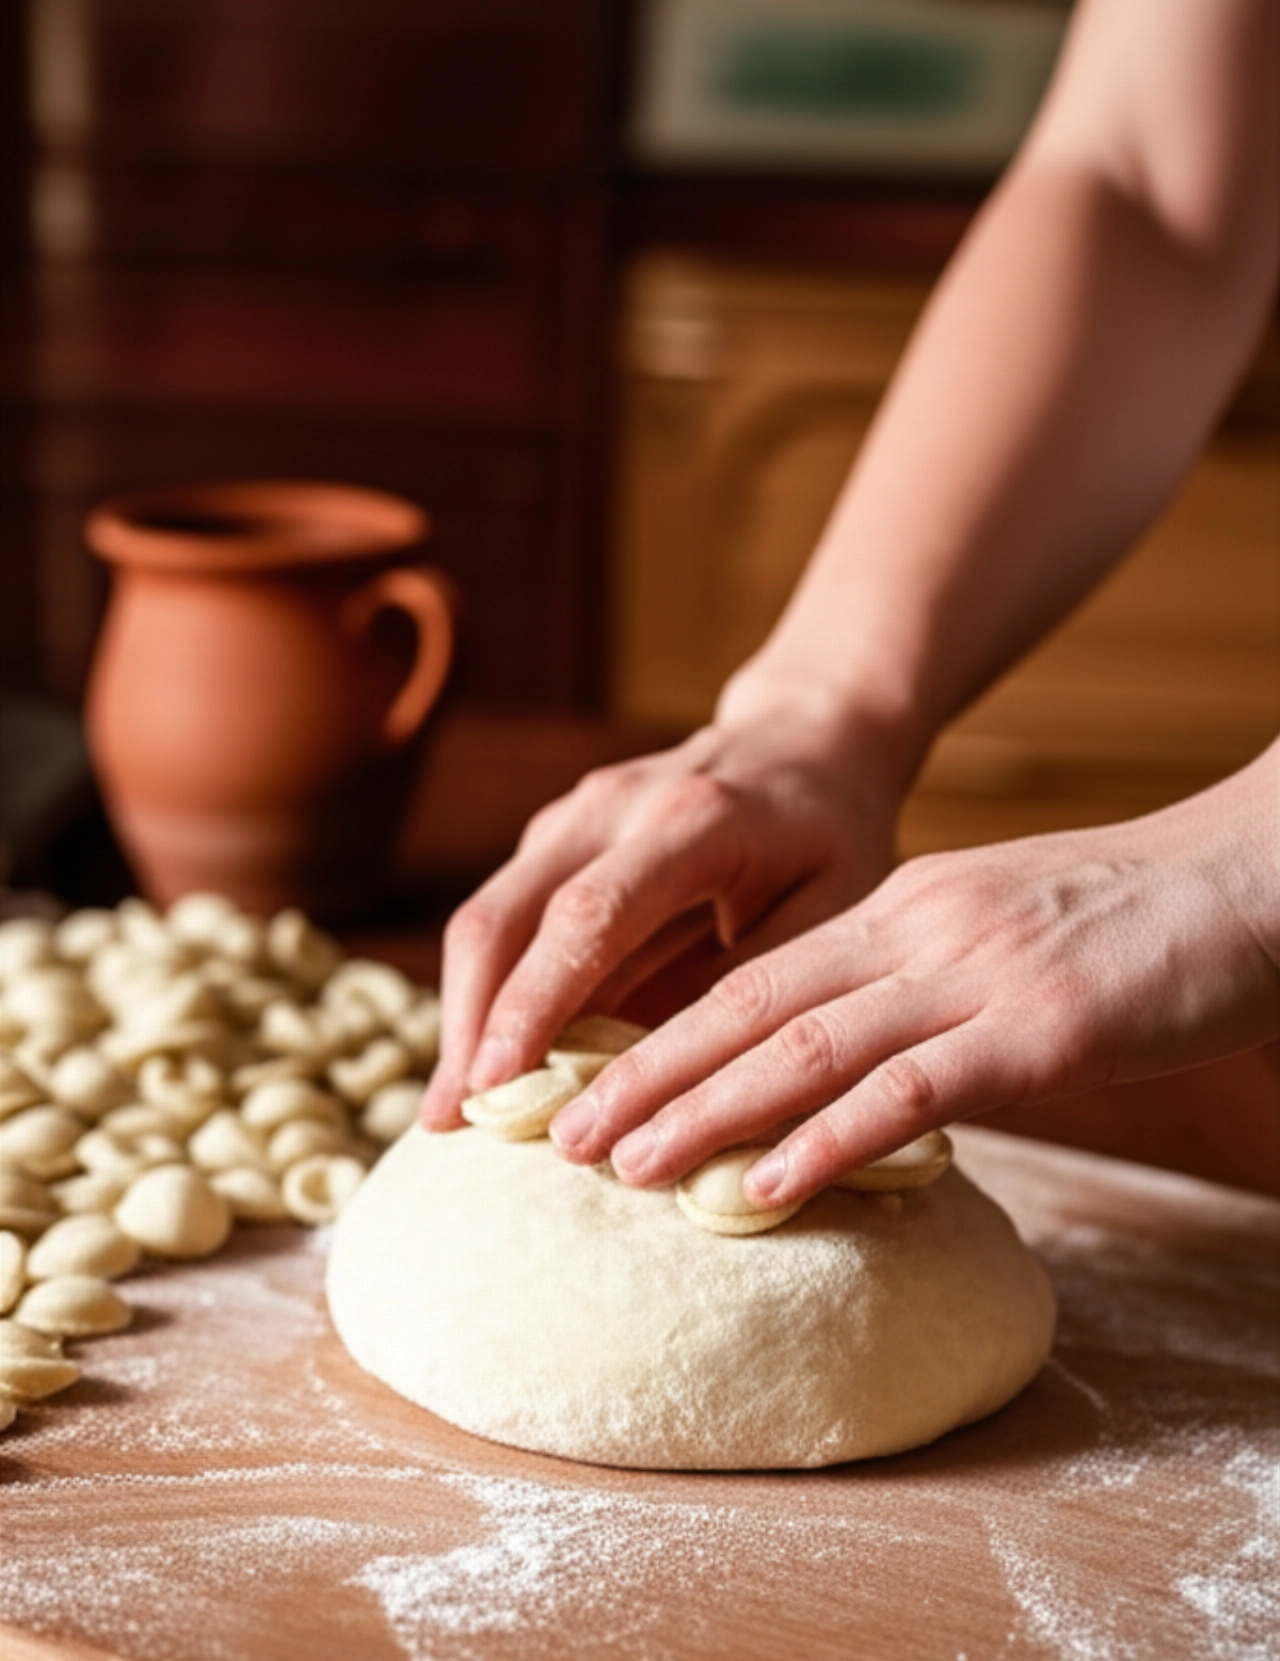
My grandmother, with her wise hands, taught me that the work surface is almost as important as the dough itself. Her secret? An untreated wooden board. Wood, in fact, is porous and absorbs excess moisture from the dough, preventing it from sticking and facilitating the "dragging" process. If you don't have a wooden board, a rough and clean surface will do, but wood is best for tradition.
Another trick she passed down to me is the right pressure. You shouldn't crush the dough with brute force, but guide it with a firm yet delicate movement, almost a caress, as you "drag" it. It's a dance between your hands and the pasta, a rhythm that you learn and that will give you orecchiette with an unmistakable shape.
Let's Prepare Puglian Orecchiette Together: The Step-by-Step Guide
Now that you know the secrets, it's time to get your hands dirty. Follow each step carefully, and you'll see that the result will surprise you!
- Prepare the dough: On a clean pastry board, pour the re-milled semolina into a well. In the center, add the salt and gradually the lukewarm water. With a fork, start incorporating the flour from the edges towards the center, then continue by hand.
- Work with love: Knead vigorously for at least 10-15 minutes. You need to obtain a smooth, elastic, and homogeneous dough ball. It should not stick to your hands or the pastry board. If it's too sticky, add a pinch of semolina; if it's too hard, a teaspoon of water.
- The warrior's rest: Form a ball, cover it with an overturned bowl or cling film, and let it rest at room temperature for at least 30 minutes. This step is crucial for elasticity.
- Form the ropes: Take a piece of dough (keep the rest covered) and, with the palms of your hands, roll it on the pastry board to form a "snake" about 1 cm thick.
- Cut and "drag": With a dull knife (or a table knife) or the tip of a sharp knife, cut pieces of dough about 1 cm. Now comes the fun part: place the knife on the piece of dough and, with light pressure, drag it towards you. A shell will form. Then, with your thumb, flip the shell over to get the classic concave shape. Repeat for all pieces.
- Drying: As you form them, arrange the orecchiette on a tray floured with re-milled semolina. Let them dry for at least an hour, or even longer if the environment is humid. This will help them maintain their shape during cooking.
- Perfect cooking: Bring plenty of salted water to a boil. Drop in the orecchiette and cook for a few minutes (usually 3-5, depending on thickness). They will be ready when they float to the surface. Drain and immediately dress with your favorite sauce!
Tips and Frequently Asked Questions about Homemade Orecchiette
I know you might still have some doubts. Here are the answers to the most common questions, to clear up any uncertainty:
- Can I use 00 flour instead of re-milled semolina? No, I strongly advise against it. 00 flour does not have the same consistency and will not give you the rough and tenacious result typical of orecchiette. Re-milled semolina is the key to authenticity.
- How can I store fresh orecchiette? If you don't cook them immediately, you can let them dry well on a floured tray for a few hours (even overnight) and then store them in the refrigerator in an airtight container for 2-3 days.
- Can I freeze orecchiette? Absolutely yes! After letting them dry well (they should be firm to the touch), arrange them on a tray without overlapping and freeze them. Once frozen, transfer them to food bags. They cook directly from frozen in boiling water.
- What is the best sauce for orecchiette? Orecchiette are versatile! The classic is with turnip greens, but they are also divine with a simple fresh tomato sauce, with Bari-style ragù or with a vegetable dressing like zucchini and cherry tomatoes.
- Why do my orecchiette stick to the pastry board or to each other? This happens if the dough is too wet or if the pastry board is not sufficiently floured. Make sure the dough is of the right consistency (not sticky) and always use a little semolina on the work surface and on the tray where you place them.
Your Masterpiece is Ready: Enjoy the Authentic Flavor!
There you have it! Now you no longer just have a recipe, but all the secrets to bring to the table a dish that tastes of home, tradition, and love. Every orecchietta you've created with your own hands is a small masterpiece, a direct bridge to the most authentic Puglian cuisine.
Don't be afraid to experiment and make these techniques your own. Cooking is a gesture of creativity and passion. But start from this solid and infallible base, and you'll see that applause will not be lacking. The satisfaction of tasting homemade pasta, with its unique consistency and genuine flavor, is priceless.
Have you tried our recipe? We are very curious to see your masterpiece! Leave a comment below, tell us how it went, or share a photo on Instagram by tagging @CercaRicette.it. If you loved these orecchiette, you can't miss our recipe for a perfect Fresh Tomato Sauce or a Bari-style Ragù that will make you lick your lips!