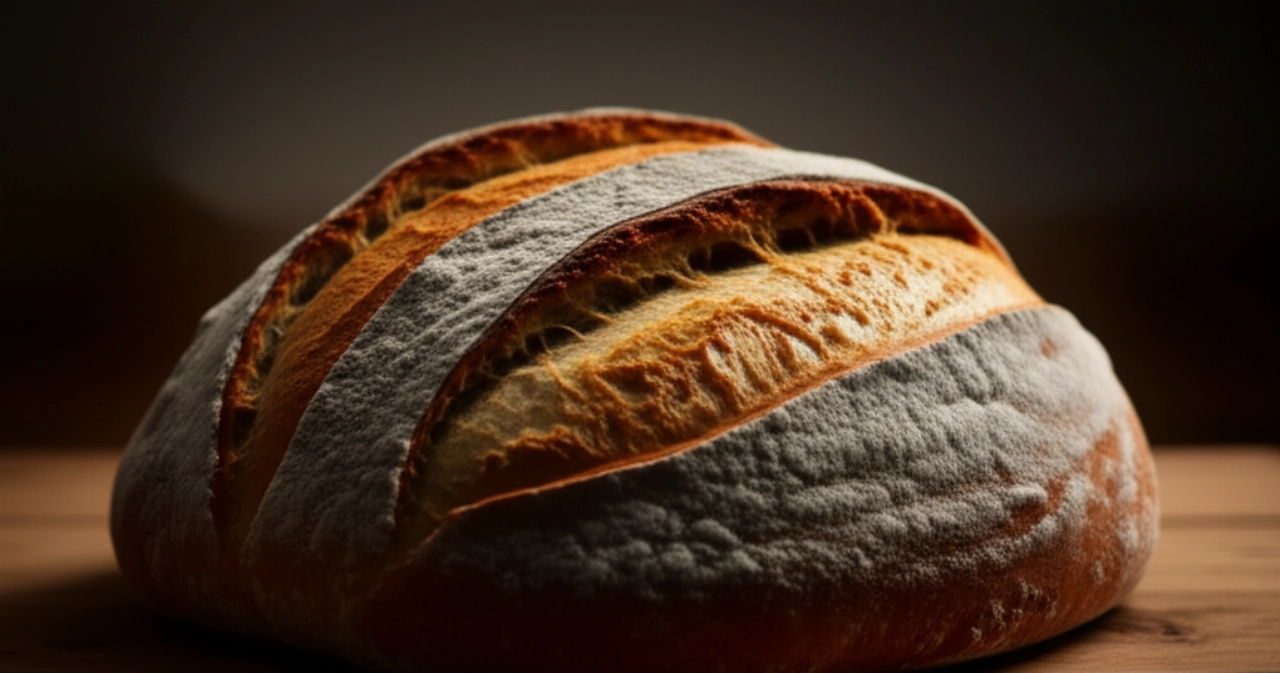
There's a scent that smells of home, of warmth, of happy memories: that of freshly baked bread. How many times have you dreamed of bringing a fragrant loaf to the table, with a crispy crust and soft crumb, made with your own hands?
Perhaps you've tried, but the result wasn't what you hoped for: a hard, under-proofed bread, or a dough too difficult to handle. The fear of making mistakes, of wasting precious ingredients and time, has held you back. Finding the right recipe, one that guarantees success, seems like a daunting task.
Make yourself comfortable. Here at Search Recipes, your kitchen "guardian," I'm revealing not just a recipe, but the ultimate guide to preparing the best and simplest homemade bread of your life. I guarantee that by following my tips, success is assured, and your kitchen will fill with an unforgettable aroma. Get ready for applause!
Ingredients for Perfect Homemade Bread: The Choice That Makes a Difference
For bread that's a true comfort, the quality of the ingredients is essential. Don't worry, they are few and simple, but their choice makes all the difference.
- Flour: I recommend type 0 or 00 flour, with a medium strength (W), around 250-280. It's ideal for a dough that rises well and develops a good structure. If you want a more rustic flavor, you can use a mix with a small percentage of whole wheat flour.
- Water: It must be lukewarm, not hot! Around 28-30°C is the perfect temperature to "awaken" the yeast without damaging it. Cold water would slow down the rising too much, while too hot water would kill it.
- Fresh brewer's yeast: It's the beating heart of our bread. Choose it fresh and always check the expiration date. If you use dry yeast, remember to activate the equivalent amount (usually 1/3 of fresh yeast).
- Salt: Don't underestimate it! It not only adds flavor but also regulates fermentation and strengthens the gluten network. Use fine salt, it dissolves better.
- Sugar (a pinch): It's not mandatory, but a pinch of sugar (or malt) helps the yeast get started with more vigor, feeding it. Don't worry, you won't taste sweetness in the final bread.
3 Common Mistakes That Can Ruin Your Bread (and How to Avoid Them)
Even the most experienced bakers have had their initial "disasters." But with these tips, you can avoid them and go straight to success:
- Not respecting proofing times: Haste is the enemy of good bread. Every dough has its own timing, dictated by ambient temperature and yeast strength. Don't force them! Under-proofed bread will be dense and gummy, while over-proofed bread will collapse during baking. Observe the dough: it should double in volume.
- Working the dough too much (or too little): If kneading by hand, it's important to develop the gluten for a good structure. But with our "no-knead" method, this problem is reduced. The important thing is to mix the ingredients well at the beginning and then let time do its work. If you do knead, don't overdo it, otherwise the gluten will "tear" and the bread won't rise well.
- Not creating enough steam in the oven: Steam in the first few minutes of baking is essential for a crispy, shiny crust. Without it, the crust forms too quickly, preventing the bread from expanding to its fullest. I'll explain how to easily create it at home.

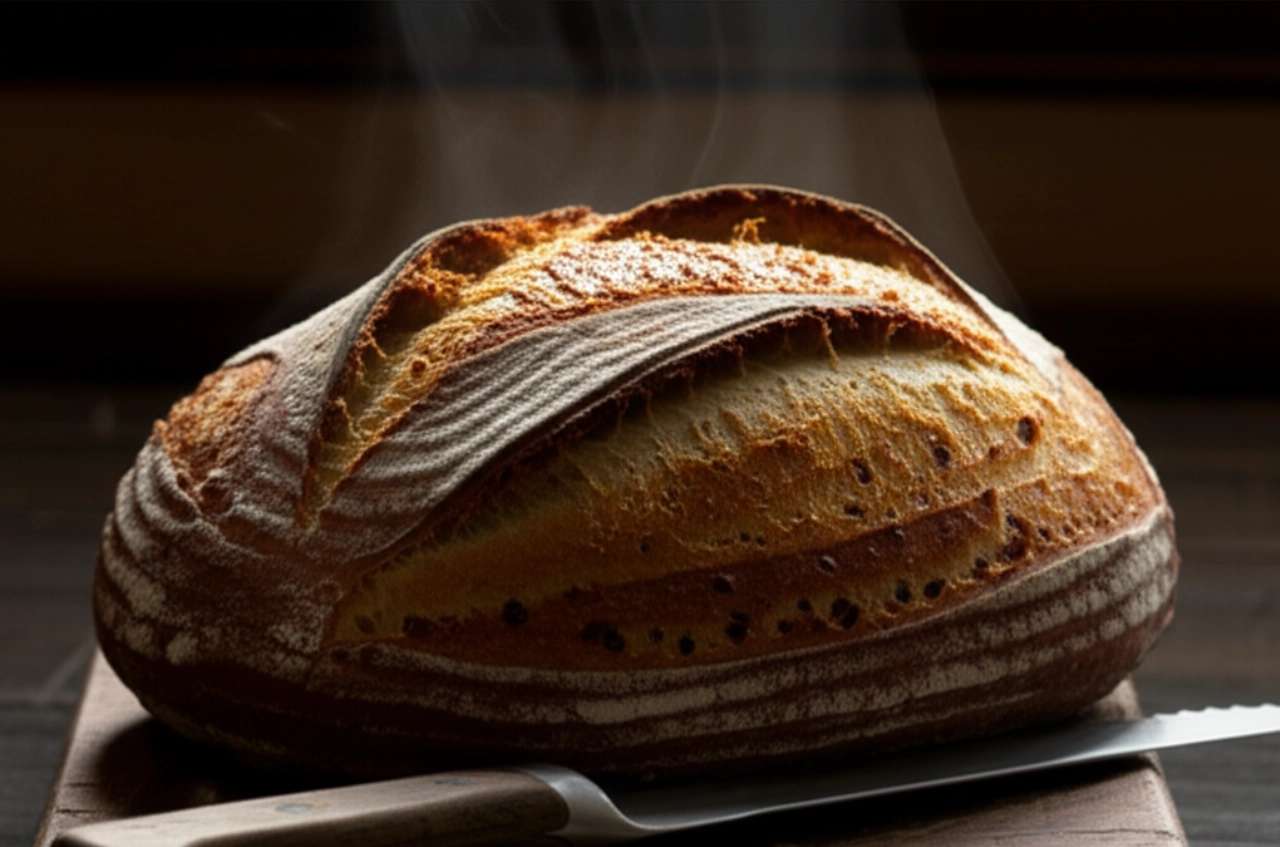
The Magic Touch: The Secret to Bread That's Crispy Outside and Soft Inside
I'll reveal a trick I've learned over years of cooking, a true "grandma's secret" (or, in this case, your guardian's!). To achieve that wonderful crust and an incredibly airy crumb, the key is baking in a cast iron (or clay) pot with a lid.
The principle is simple: the pot, preheated to a very high temperature, creates an environment similar to a professional oven. The lid traps the steam released by the dough in the first few minutes of baking, allowing the bread to expand to its fullest before the crust hardens. The result? Bread with a thin, very crispy, golden crust, and a moist, soft crumb full of bubbles. If you don't have a cast iron pot, don't worry, I'll give you an alternative!
Let's Prepare Homemade Bread Together: The Step-by-Step Guide
Are you ready? Put on your apron, make yourself comfortable, and follow each step with confidence. Success is within reach!
Ingredients:
- 500 g of type 0 or 00 flour (W 250-280)
- 350 ml of lukewarm water (approx. 28-30°C)
- 5 g of fresh brewer's yeast (or 1.5 g of dry brewer's yeast)
- 10 g of fine salt
- A pinch of sugar (optional)
Tools:
- A large bowl
- A wooden spoon or spatula
- Plastic wrap or a damp cloth
- Parchment paper
- A cast iron pot with a lid (or a baking sheet and a small pot with water)
Instructions:
- Prepare the preferment (if using fresh yeast): In a small bowl, dissolve the fresh yeast and a pinch of sugar (if using) in 50 ml of lukewarm water taken from the total. Let it rest for 5-10 minutes until a light foam forms on the surface. If using dry yeast, mix it directly with the flour.
- Combine the ingredients: In the large bowl, pour the flour. Add the preferment (or dry yeast mixed with flour) and the remaining lukewarm water. Begin mixing with a wooden spoon or spatula. When the dough starts to take shape, add the salt.
- Mix briefly: Continue mixing only for the time necessary to absorb all the flour and obtain a sticky, lump-free dough. You don't need to knead for a long time, just combine! This is the secret of the "no-knead" method.
- First proofing (long and slow): Cover the bowl with plastic wrap or a damp cloth and let it proof at room temperature (around 20-22°C) for at least 8-12 hours. Ideally, prepare it in the evening for the next morning. The dough should double, or even triple, in volume and show many bubbles on the surface. If the temperature is lower, the times will be longer.
- Prepare for the second proofing: Lightly flour your work surface. With the help of a spatula, gently turn the dough out onto the floured surface. Do not deflate it! Fold it over itself 3-4 times, bringing the edges towards the center, forming a rough ball.
- Second proofing (shorter): Transfer the dough to a sheet of parchment paper. You can shape it into a more round or oval form. Cover with a cloth and let it proof for another 30-60 minutes while the oven heats up.
- Preheat the oven with the pot: Place the cast iron pot (with lid) in the cold oven. Turn the oven to 230°C (static). Let the oven and pot heat for at least 30-45 minutes. It's crucial that the pot is scorching hot!
- Bake the bread: Very carefully (use oven mitts!), remove the scorching hot pot from the oven. Gently lift the dough with the parchment paper and transfer it into the hot pot. Cover with the lid.
- Baking (first phase with lid): Bake the covered pot for 30 minutes at 230°C. This will create the perfect humid environment for the bread to grow.
- Baking (second phase without lid): After 30 minutes, remove the lid and continue baking for another 15-20 minutes, or until the crust is well golden and crispy. If you don't have a cast iron pot, you can bake the bread on a baking sheet and place a small pot with boiling water at the bottom of the oven to create steam.
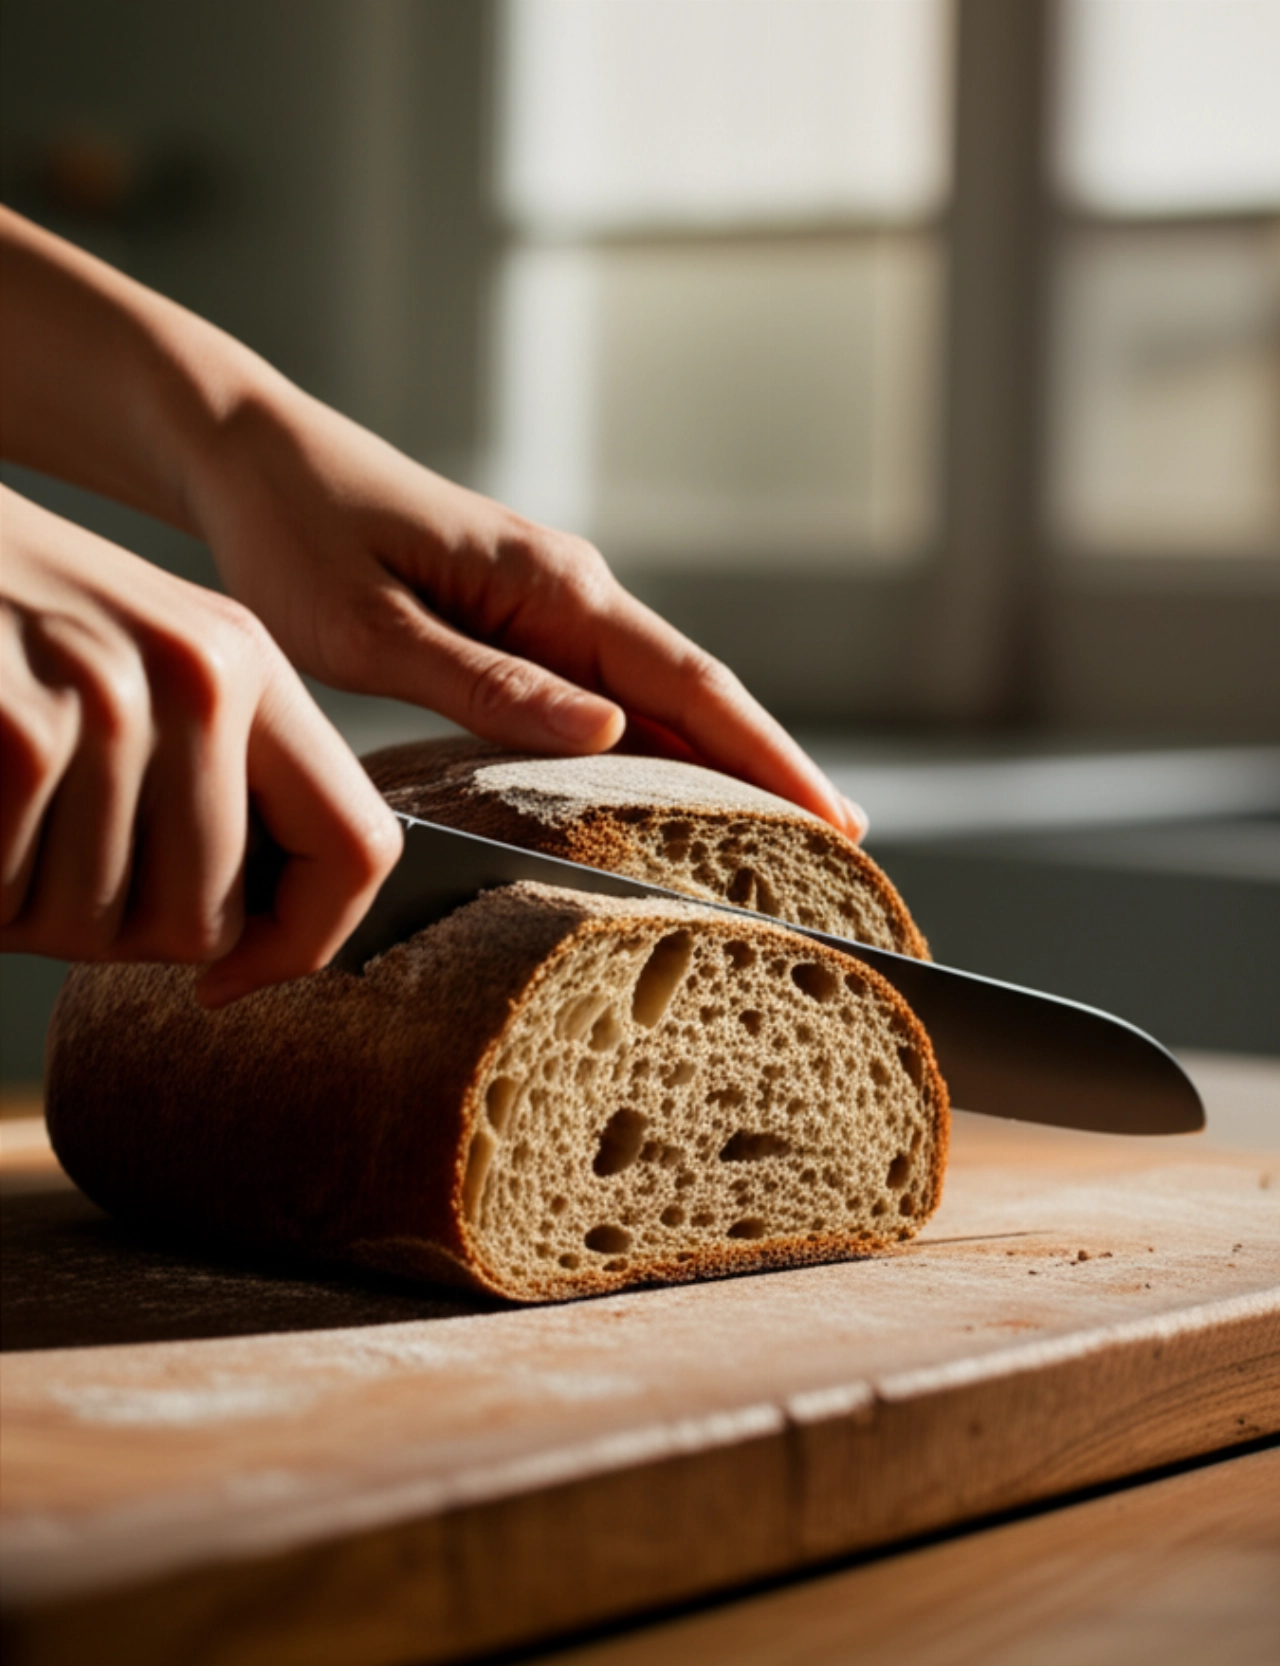
- Cooling: Once baked, remove the bread from the pot and let it cool completely on a wire rack. Resist the temptation to cut it immediately! Cooling is crucial for the internal structure and crust crispness.
Tips and Frequently Asked Questions About Homemade Bread
Here are some of the most common questions I get asked about homemade bread. I hope they are helpful!
- Can I use only whole wheat flour?
- Certainly! Whole wheat bread is delicious and nutritious. Keep in mind that whole wheat flours absorb more water, so you might need to add a few more tablespoons. Additionally, the proofing might be slightly slower and the bread less voluminous, but the flavor will be more rustic and intense.
- How can I store homemade bread?
- Homemade bread is at its best on the same day. To store it, wrap it in a clean cotton cloth or a paper bag. Avoid plastic, which would make it gummy. It keeps well for 2-3 days. You can also freeze it sliced or whole: once thawed and warmed, it will be almost like freshly baked!
- Why isn't my bread rising?
- There are several reasons: the yeast might be old or inactive, the water too hot or too cold, or the room temperature too low. Make sure the yeast is fresh and the water is lukewarm. If your kitchen is cold, you can proof the dough in a turned-off oven with the light on, which creates a slightly warmer environment.
- Can I add seeds or olives to the dough?
- Absolutely! The beauty of homemade bread is that you can customize it. Add sesame, flax, sunflower seeds, nuts, olives, or aromatic herbs to the dough during the initial mixing phase. Experiment and create your unique bread!
There you have it! Now you no longer have just a recipe, but all the secrets to bring to your table a homemade bread that smells of home, tradition, and love. A scent that will envelop you and a taste that will make you feel like a true baker, even if it's your first time.
Don't be afraid to experiment and make this process your own. Cooking is an act of creativity and satisfaction. But start with this solid foundation, and you'll see that applause, and requests for "just one more piece!", will not be lacking.
Have you tried our homemade bread recipe? We're very curious to see your masterpiece! Leave a comment below, tell us how it went, or share a photo on Instagram by tagging @CercaRicette.it. If you loved the magic of bread, you can't miss our recipe for a perfect Homemade Tomato Sauce for dipping, or to accompany a delicious Beef Stew with Potatoes. Your kitchen awaits!