Introduction: The Scent of Home Only Cafone Bread Can Offer
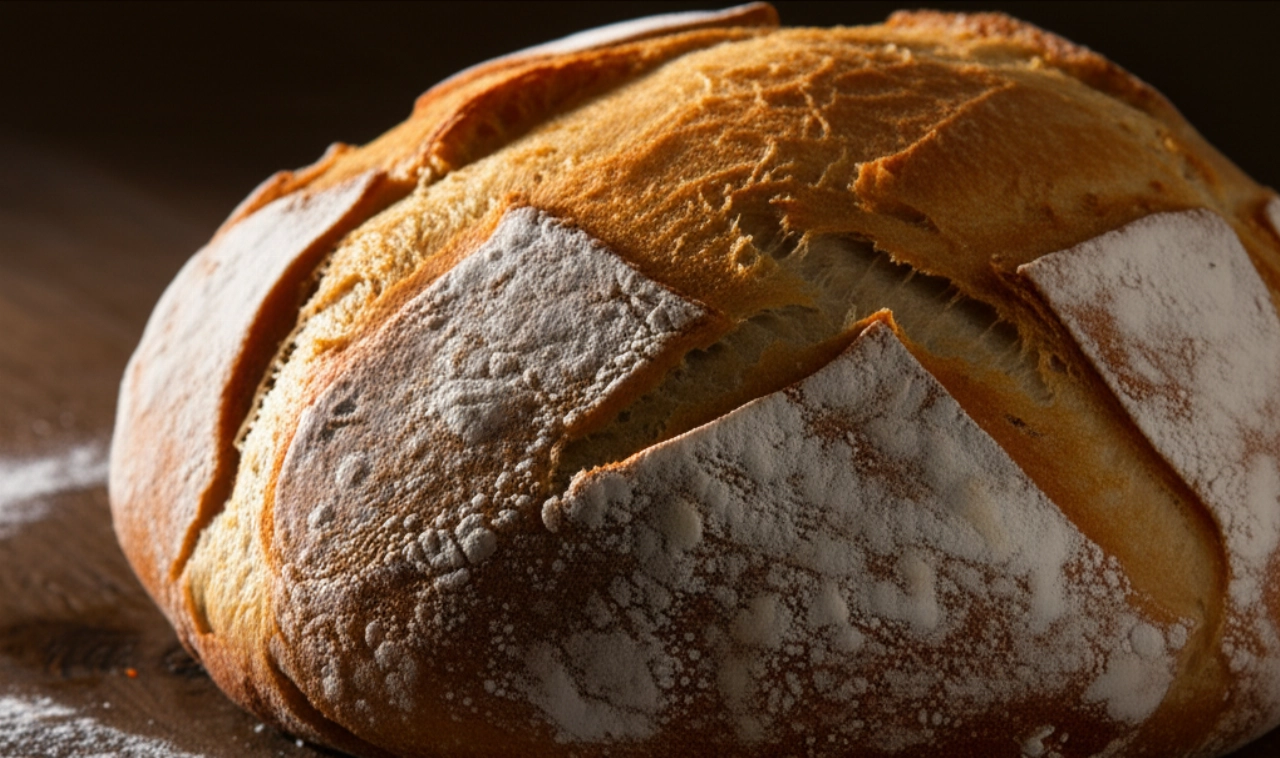
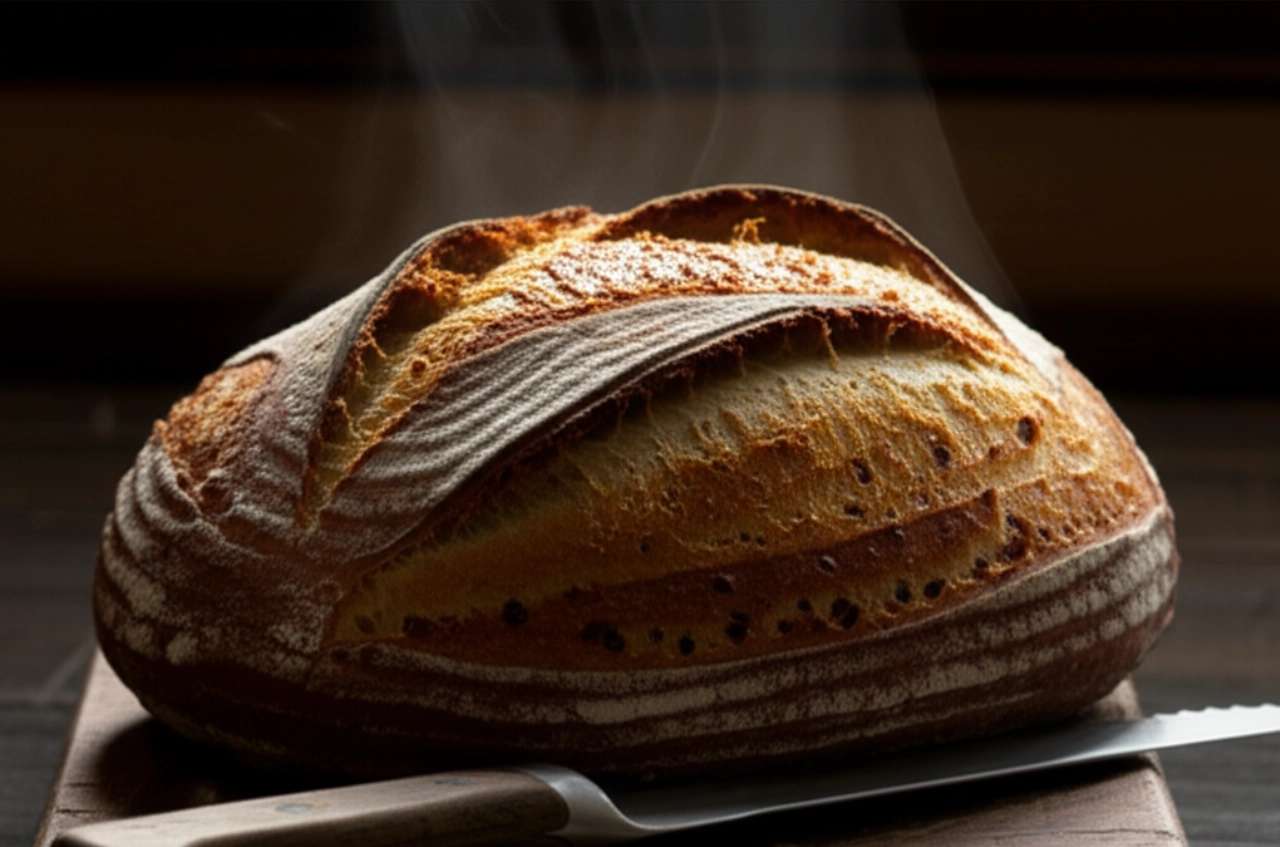
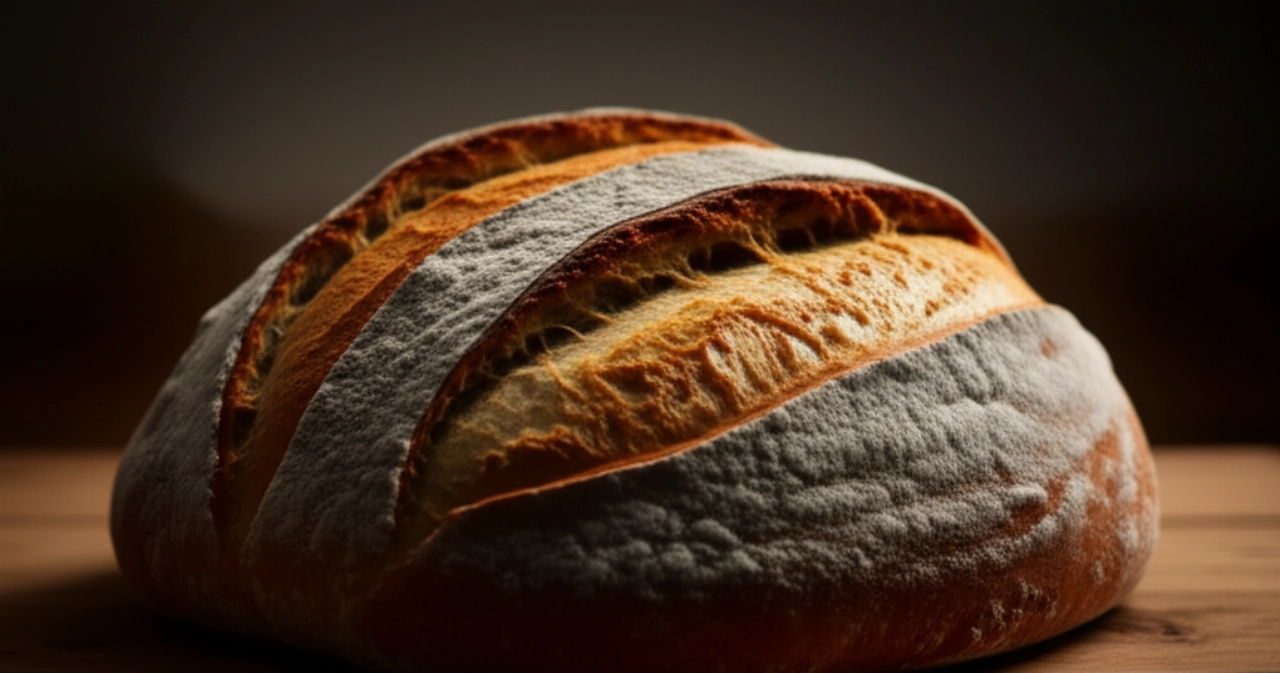
There's a scent that speaks of home, tradition, a time when bread was the heart of the table, capable of transforming a simple meal into an unforgettable experience. We're talking about Neapolitan Cafone Bread, a true symbol of authenticity, with its dark, crispy crust that crackles under your teeth and a soft, airy, incredibly fragrant crumb.
How many times have you dreamed of baking bread like this, as if it came straight from a village oven? And how many times have you struggled with doughs that don't rise, soft crusts, or bland flavors, feeling frustrated and thinking that baking was an art too complex for you? The fear of wasting precious time and ingredients is a feeling I know well.
Make yourself comfortable. Today, I won't just give you a simple list of ingredients, but I'll take your hand and guide you into the magical world of Neapolitan Cafone Bread. With sourdough and my tricks, success is guaranteed. It will be the best bread you've ever baked, the one that will make you say: "This is the only recipe I'll ever need. Here, I feel at home." Your Cafone Bread will have that irresistible crust and a wonderfully airy and fragrant crumb, using sourdough stress-free, even if it's your first time.
Ingredients for Authentic Cafone Bread: The Choice That Makes the Difference
The magic of Cafone Bread begins with the selection of ingredients. Each element plays a fundamental role in ensuring that unique flavor and perfect consistency. It's not just about quantity, but about quality and awareness.
- Sourdough Starter (Mother Dough): Approximately 150-200g, refreshed and active. It's the beating heart of your bread. Sourdough not only ensures natural leavening and greater digestibility but also gives the bread a complex aromatic bouquet and superior shelf life that no commercial yeast can ever match. Make sure it has been refreshed at least 4-6 hours prior and has doubled in volume. If you have doubts about how to refresh it, click here for our detailed guide.
- Soft Wheat Flour Type 0 or 00 (high W): Approximately 500g. For Cafone Bread, we need a "strong" flour, with a high protein content (W > 280), capable of developing an excellent gluten network. This is crucial for trapping fermentation gases and creating that airy and soft crumb we so desire. You can also use a mix of Type 0 flour and a small percentage of re-milled semolina for a more rustic flavor and a thicker crust.
- Cold Natural Water: Approximately 350-400ml (70-80% hydration). Cold water is crucial for controlling the dough's temperature, especially if kneading by hand or with a stand mixer that tends to heat up. Dough that is too warm accelerates fermentation and can compromise the final structure. Use non-chlorinated water to avoid inhibiting yeast activity.
- Fine Sea Salt: Approximately 10-12g. Salt is not only a flavor enhancer but also plays a structural role in the dough, strengthening the gluten network and controlling yeast activity. Never add it in direct contact with the sourdough starter, to avoid "burning" it.
3 Common Baking Mistakes (and How to Avoid Them for Cafone Bread)
Baking can seem like a daunting task, but often small mistakes compromise the final result. As a kitchen "guardian," I'll reveal the most common pitfalls and how to avoid them, to guarantee your success.
- Not Respecting Proofing Times (Haste is the Enemy of Bread): The temptation to speed things up is strong, but sourdough bread requires patience. Insufficient proofing will make the bread dense and less digestible, while excessive proofing will cause it to collapse during baking. Learn to "read" the dough: it should have doubled, be elastic, and full of bubbles. Don't watch the clock, watch the dough!
- Not Managing Hydration Well (Dough Too Dry or Sticky): Hydration is key for an airy crumb. Dough that is too dry will be difficult to work with and result in a compact bread. One that is too sticky will be unmanageable. Start with the minimum indicated hydration and add water gradually, little by little, until you achieve the desired consistency. The dough should be soft but workable.
- Not Creating Steam During Baking (Soft Crust): Steam is the secret to a crispy, shiny crust. Without steam, the crust forms too quickly, preventing the bread from expanding fully and making it hard and dull. I'll explain how to create the perfect environment in your home oven to achieve that crackling crust you dream of.
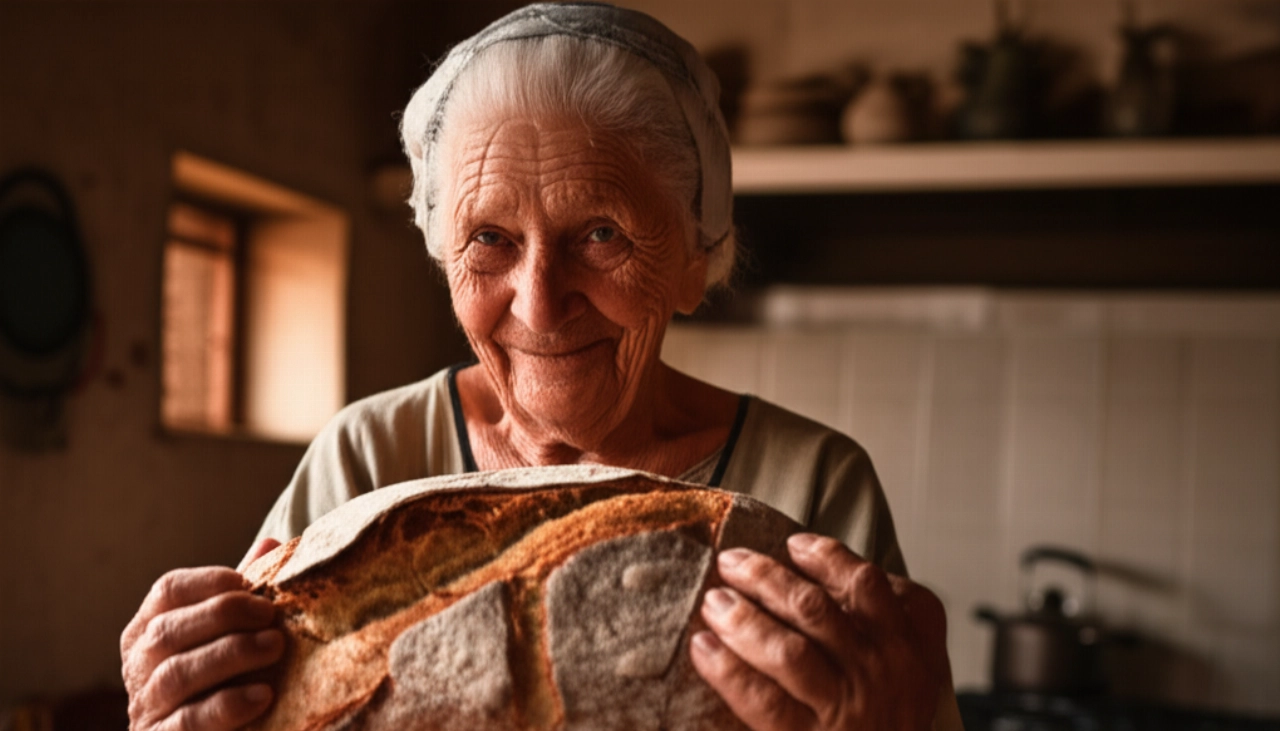
The Magic Touch: My Grandmother's Bread Tip
My grandmother, with flour-dusted hands and a wise smile, always used to say: "Bread wants hands and heart, but most of all, it wants respect for its time." Her true secret, known to few, was not just patience, but meticulous attention to water temperature and the proofing environment.
She always used very cold water, almost icy, especially in summer. This slowed down the initial dough, allowing the gluten to develop better without overheating. And then, for the first proofing, she placed the dough in a terracotta bowl, covered with a damp cloth, positioning it in a corner of the kitchen where the temperature was more constant, away from drafts. Terracotta maintains a more stable temperature, favoring a slow and uniform proofing, which is the basis for digestible and flavorful bread.
Another trick for the crust: before baking, she would spray a little water on the oven walls with a spray bottle. This created a humid environment that allowed the bread to puff up to its maximum before the crust solidified, ensuring that crispiness and shine typical of bakery bread.
Let's Prepare Cafone Bread Together: The Step-by-Step Guide to a Masterpiece
Now that you know the secrets and mistakes to avoid, it's time to get your hands dirty. Follow each step carefully, and your Cafone Bread will be a guaranteed success.
- Refreshing the Sourdough Starter (the night before or 6 hours prior): Ensure your sourdough starter is very active. Refresh it with the usual proportion (e.g., 1:1:1 starter:water:flour) and let it double in volume. It will be ready when it floats in water.
- Autolyse (30 minutes): In a large bowl, combine all the flour with about 80% of the planned cold water (320ml out of 400ml). Mix roughly with a spoon or your hands until the flour is completely hydrated and there are no dry lumps. Cover with plastic wrap and let rest for at least 30 minutes. This step, called autolyse, allows the flour to fully hydrate and the gluten to begin developing on its own, making the dough more elastic and easier to work with.
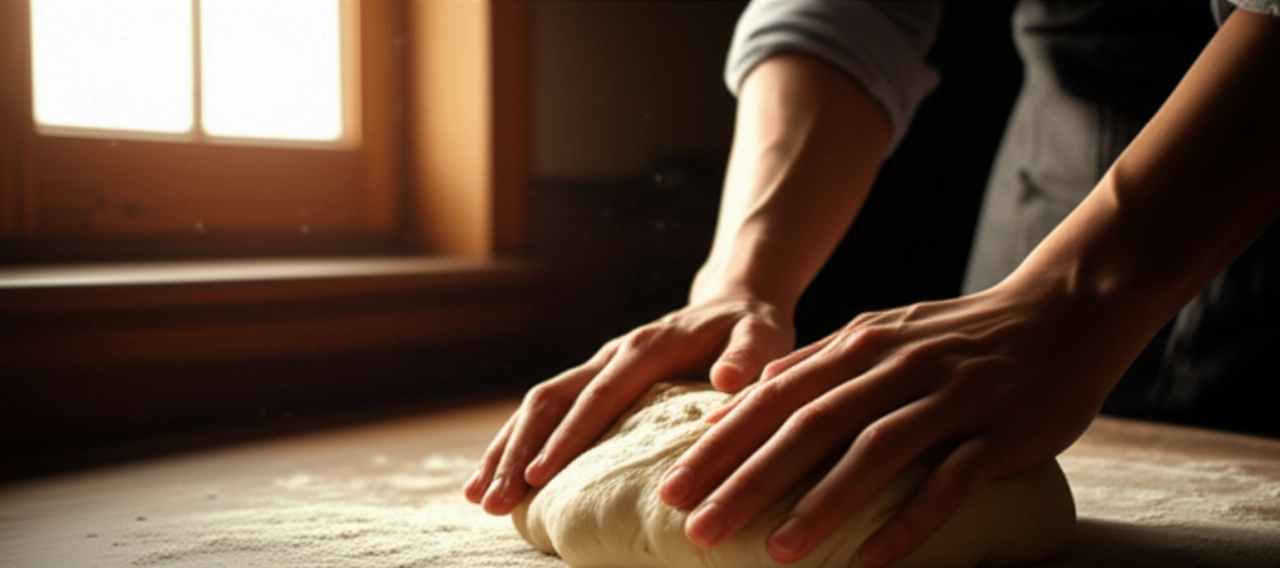
- First Kneading and Sourdough Incorporation (15-20 minutes): After the autolyse time, add the refreshed sourdough starter in pieces to the dough. Begin kneading vigorously. If using a stand mixer, use the dough hook. If kneading by hand, use the "slap & fold" technique (pick up the dough, slap it on the work surface, and fold it over itself) or classic folds. The goal is to fully incorporate the starter and begin developing the gluten network.
- Adding Salt and Remaining Water (10 minutes): When the dough starts to become smooth and elastic, add the salt. Continue kneading and, little by little, add the remaining water (the last 80ml). Don't rush; add the water in small doses, waiting for it to be absorbed before adding more. The dough will become softer and more hydrated. Continue kneading until you obtain a smooth, homogeneous, and elastic dough that easily detaches from the sides of the bowl or your hands.
- First Proofing (Bulk Fermentation) and Stretch & Folds (3-4 hours): Transfer the dough to a lightly oiled bowl, cover with plastic wrap or a lid, and let it proof at room temperature (around 24-26°C) for 3-4 hours. During this time, perform 3-4 sets of stretch & folds every 45-60 minutes. For the folds, take a section of the dough, gently pull it upwards, and fold it towards the center. Rotate the bowl 90 degrees and repeat for all four sides. This strengthens the gluten network and distributes the fermentation gases. The dough should double in volume.
- Dividing and Pre-shaping (15 minutes): Gently turn the proofed dough onto a lightly floured work surface. Do not deflate it too much. Divide it into two parts if you want two smaller loaves, or leave it whole. Pre-shape the dough into a ball (pirlatura), trying to create surface tension. Let it rest for 15-20 minutes, covered with a cloth, to allow the gluten to relax.
- Final Shaping and Second Proofing (Final Proof) (2-3 hours or in the fridge): Shape the bread into its final form (round or elongated), trying to create good surface tension. Transfer the dough to a well-floured proofing basket (banneton) with the seam side up. Cover and let it proof for another 2-3 hours at room temperature, or place it in the refrigerator for 8-12 hours (slow proofing, which enhances flavor). The bread will be ready when, by gently pressing with a finger, the indentation slowly springs back.
- Baking (40-50 minutes): Preheat your oven to its maximum temperature (250°C) with a baking stone or a thick baking sheet inside for at least 30-40 minutes. If you have a Dutch oven with a lid, preheat it along with the oven.
- With a Dutch oven: Carefully remove the hot Dutch oven, gently invert the bread from the banneton directly into the pot. Score the surface with a sharp razor blade (scarification). Cover with the lid and bake for 20 minutes at 250°C.
- Without a Dutch oven (with steam): Invert the bread onto the hot baking stone or sheet. Score the surface. Place a tray with boiling water at the bottom of the oven to create steam. Bake for 20 minutes at 250°C.
- Cooling: Once baked, remove the Cafone Bread from the oven and let it cool completely on a wire rack. This is a crucial step! Never cut it while hot, otherwise the crumb will be gummy and moist. Cooling allows the internal moisture to distribute evenly and the crust to become perfectly crispy.
Tips and Frequently Asked Questions about Neapolitan Cafone Bread
Here are some of the most common questions I get asked, with my "grandma chef" answers to clarify all your doubts.
- Can I use commercial yeast instead of sourdough starter?
- Yes, technically you can, but the result won't be the same. Commercial yeast will give you a faster-rising bread but will lack the aromatic complexity, digestibility, and shelf life that only sourdough starter can offer. If you want authentic Cafone Bread, I encourage you to try with sourdough starter: the satisfaction will be immense!
- How do I know if my sourdough starter is active and ready to use?
- The most reliable test is the "float test." Take a small piece of your refreshed sourdough starter and place it in a glass of water. If it floats, it's active and ready. If it sinks, it needs another refresh or more time to activate.
- My dough is too sticky, what should I do?
- Don't despair! High hydration is typical for breads with an airy crumb. Instead of adding more flour (which would make the bread denser), try lightly wetting your hands with water during folds or shaping. Work on a slightly damp surface rather than a floured one. With practice, you'll learn to handle even the most hydrated doughs.
- Why isn't my crust crispy or why does it soften quickly?
- There are several factors. The first is steam during baking: make sure to create enough in the first few minutes. The second is cooling: the bread must cool completely on a wire rack to allow moisture to evaporate and the crust to solidify. If you cut it hot or put it in a bag before it's cold, the crust will soften.
- Can I freeze Cafone Bread?
- Absolutely! Once the bread is completely cold, you can slice it or freeze it whole. Wrap it tightly in plastic wrap and then in a freezer bag. When you want to enjoy it, let it thaw at room temperature and then warm it in a hot oven for a few minutes: it will be like freshly baked!
Your Masterpiece is Ready: An Embrace of Flavor and Tradition
There you have it! Now you don't just have a recipe, but all the secrets to bring a Cafone Bread to your table that tastes of home, tradition, and love. Every slice will be an invitation to "scarpetta" (mopping up sauce) in your gravy, a perfect accompaniment to your favorite dishes, or simply a delight to enjoy with a drizzle of extra virgin olive oil.
Don't be afraid to experiment. Baking is an act of creativity and patience. Every bread you bake will be an experience, a learning curve. But start from this solid base, and you'll see that applause won't be lacking. Your kitchen will become the place where magic happens, and you, its guardian.
Have you tried our recipe? We're eager to see your masterpiece! Leave a comment below, tell us how it went, or share a photo on Instagram by tagging @CercaRicette.it. If you loved the magic of sourdough and the authentic taste of tradition, you can't miss our recipe for Neapolitan Pizza with Sourdough, perfect for your evenings with friends, or to accompany your bread with a Neapolitan Ragù Sauce, a timeless classic that enhances every crumb.