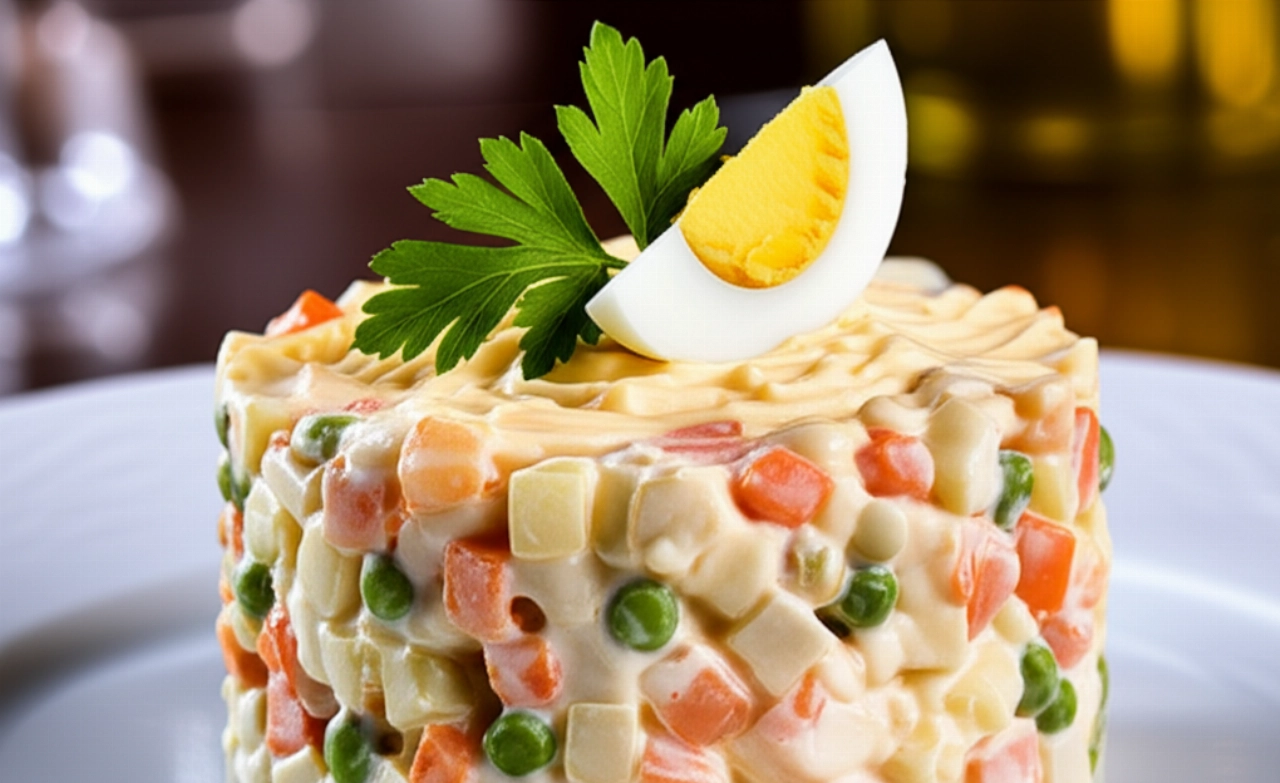
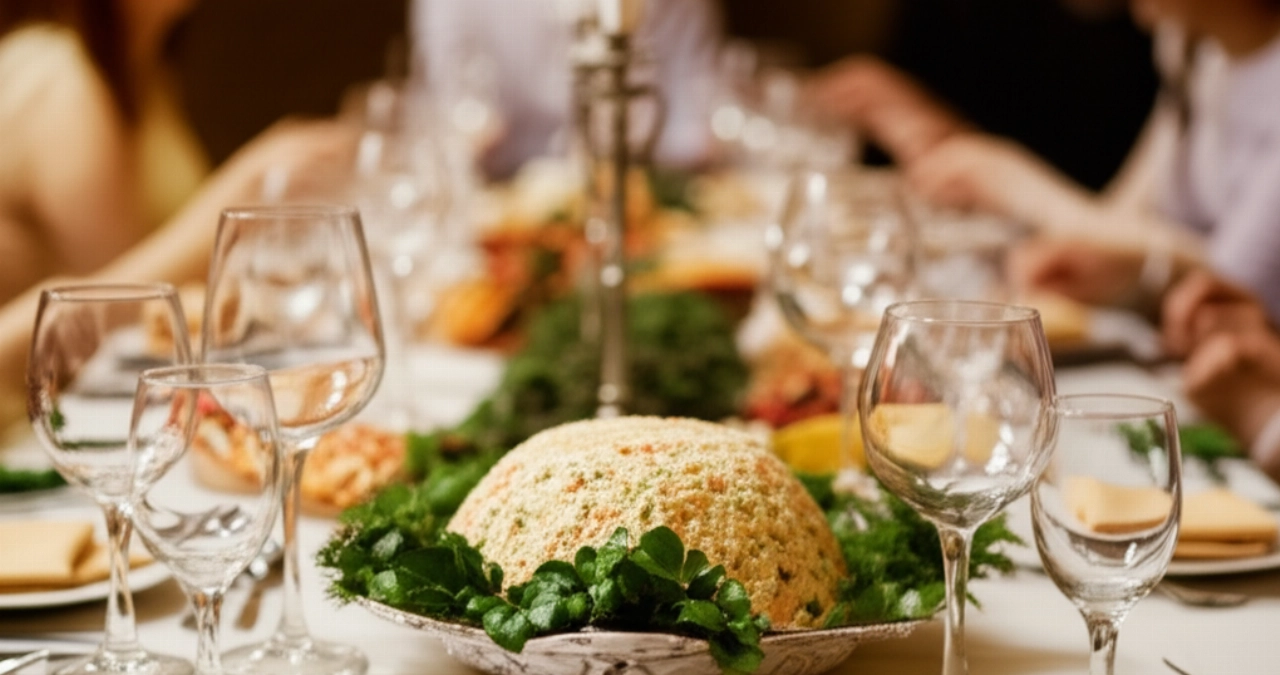
There's a dish that, as soon as you mention it, immediately evokes memories of parties, Sunday lunches, and the taste of home: Russian Salad. That creamy, rich, and enveloping masterpiece, capable of winning over everyone, from the youngest to the most demanding gourmets.
But how many times have you tried to make it and the result wasn't what you hoped for? Too runny, too thick, bland, or with that unpleasant sour note that ruins everything? Finding 'the real' recipe, the one that makes you say 'it's just like grandma used to make it,' seems like a challenge.
Make yourself comfortable. On this page, you won't just find a list of ingredients, but the definitive guide, full of tricks and tips, to prepare the best, creamiest, and most authentic Russian Salad you've ever tasted. Success is guaranteed, and you'll feel right at home, just like in grandma's kitchen.
Perfect Creaminess and Foolproof Simplicity: The Secret of Our Russian Salad
No more runny or too compact Russian salad! Our promise is to guide you step by step to achieve a velvety creaminess and authentic flavor, with tricks to make it easy and foolproof. Our goal? A Russian salad that melts in your mouth, with every ingredient in its place, no surprises, a true embrace of flavor.
Ingredients for a Stand-Out Russian Salad: The Choice That Makes the Difference
The quality of ingredients is the first step towards success. It's not just about listing them, but understanding why each element is fundamental.
- Potatoes: Choose yellow-fleshed potatoes, preferably starchy ones. They provide the soft base and the right consistency. Avoid new or waxy potatoes, which tend to remain too firm.
- Carrots: Fresh and crisp, they add sweetness and color. Cut them into small, regular cubes so they cook evenly and mix better.
- Peas: You can use fresh or high-quality frozen peas. They add a note of freshness and a touch of sweetness that balances the flavor.
- Mayonnaise: This is the heart of Russian Salad. If you have time, prepare homemade mayonnaise: the difference is huge! Otherwise, choose a high-quality mayonnaise with a delicate flavor and no acidic aftertaste.
- Mixed Pickles: Gherkins and giardiniera (carrots, cauliflower, small onions) are essential. Their acidity balances the richness of the mayonnaise and vegetables, giving that lively touch that makes Russian salad irresistible. Drain them very well and chop them finely.
- Salt and Pepper: Adjust the flavor with fine salt and freshly ground black pepper.
The 3 Common Mistakes in Russian Salad (and How to Avoid Them)
As a true kitchen guardian, I'll warn you about the most common pitfalls that can ruin your Russian Salad. Knowing them is already half the battle!
- Overcooked or undercooked vegetables: If the vegetables are mushy, the Russian salad will be watery and lack texture. If they are too hard, it will be unpleasant to the palate. They should be cooked al dente, tender but still slightly firm.
- Poor quality mayonnaise or incorrect dosage: Mayonnaise that is too acidic or too thick compromises everything. And pay attention to the quantity: too little will make the salad dry, too much will make it cloying and heavy.
- Not letting it rest: Russian Salad needs time. Preparing and serving it immediately doesn't do it justice. Resting in the refrigerator allows the flavors to meld and the mayonnaise to bind perfectly with the vegetables.
The Extra Touch: The Tip My Grandma Passed Down to Me for Russian Salad
Grandma always said that patience is the secret ingredient of every dish that tastes like home. For Russian Salad, she taught me a simple but effective trick: cook the vegetables separately. Not all together! Potatoes take longer, carrots less, peas very little. This way, each vegetable will be cooked to perfection, maintaining its ideal texture and vibrant color. And a pinch of salt in the vegetable cooking water will make them tastier from the start.
Let's Prepare Russian Salad Together: The Step-by-Step Guide
Ingredients:
- 500 g yellow-fleshed potatoes
- 300 g carrots
- 200 g peas (fresh or frozen)
- 200 g mayonnaise (homemade or high-quality)
- 100 g mixed pickles (gherkins, giardiniera)
- Fine salt to taste
- Freshly ground black pepper to taste
Tools:
- Pots of various sizes
- Colander
- Large bowl
- Knife and cutting board
Method:
- Prepare the vegetables:
Peel the potatoes and carrots. Cut them into cubes of about 0.5-1 cm. Try to be precise, regularity is important for uniform cooking and a nice final appearance. - Cook the potatoes:
Place the potatoes in a pot with cold salted water. Bring to a boil and cook until tender but still firm (about 15-20 minutes, depending on size). Drain them and let them cool completely on a tray, well spaced out. - Cook the carrots:
In another pot, bring salted water to a boil. Add the carrots and cook for about 8-10 minutes, until tender but still crisp. Drain them and cool immediately under cold running water to stop the cooking and maintain their bright color. Let them drain well. - Cook the peas:
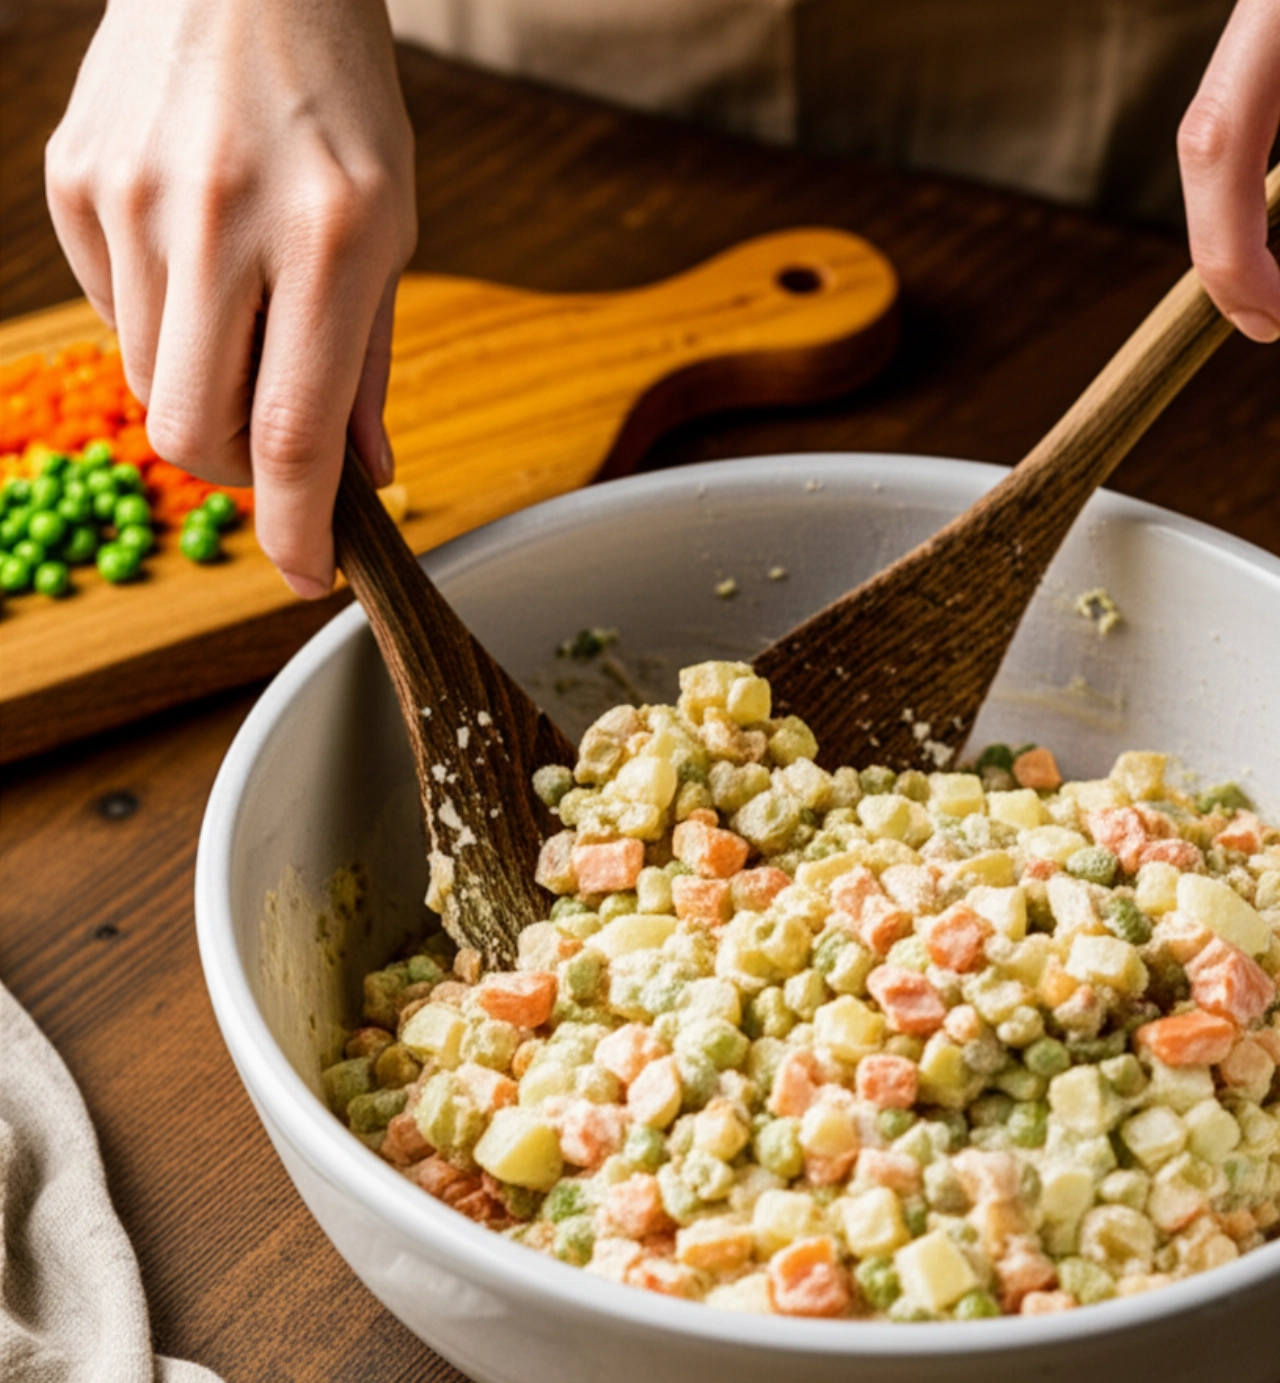
In the same water as the carrots (if you kept it clean), cook the peas for 3-5 minutes (if fresh) or according to package instructions (if frozen). They also need to be drained and cooled immediately. - Prepare the pickles:
Drain the pickles very well and chop them finely. It's important that they are well-drained so they don't release water into the salad. - Assemble the salad:
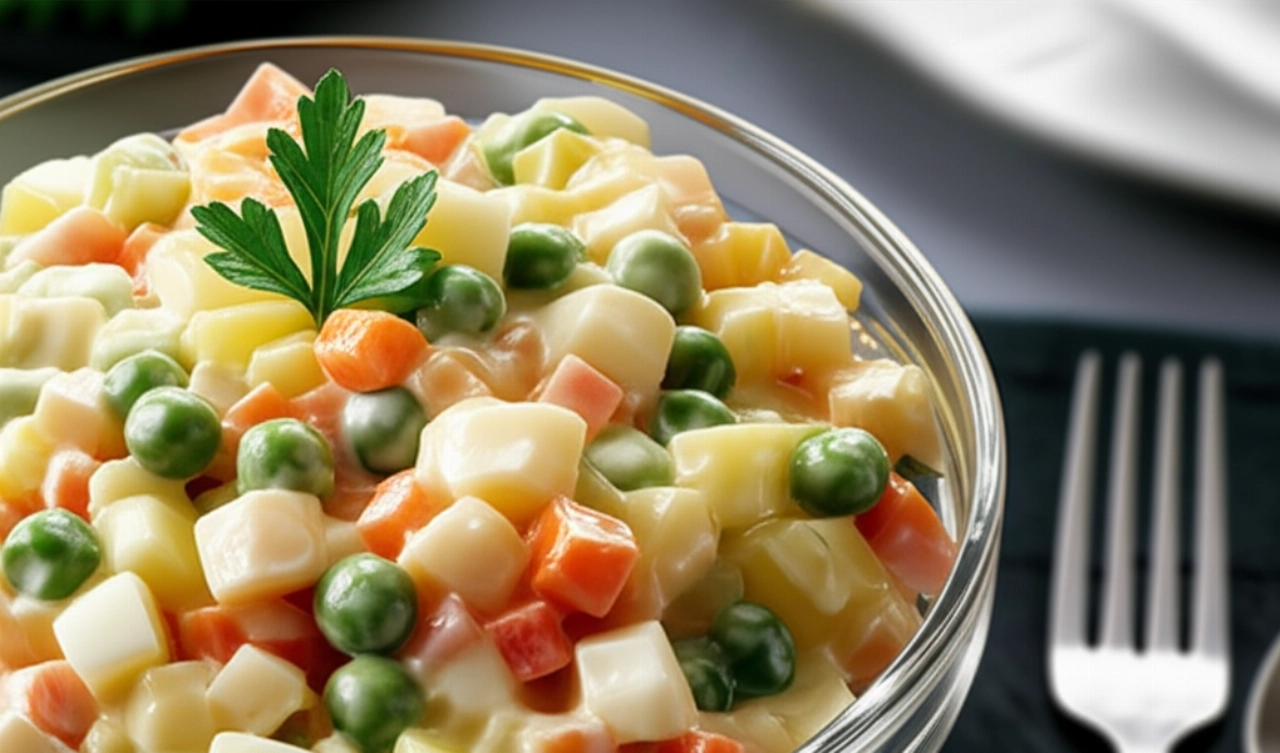
In a large bowl, combine the potatoes, carrots, peas, and chopped pickles. Make sure all vegetables are completely cold before adding the mayonnaise. - Add the mayonnaise:
Incorporate the mayonnaise into the vegetables. Start with a smaller amount and gradually add until you achieve the desired creaminess. Mix gently with a spatula or wooden spoon, using upward strokes, to avoid mashing the vegetables. - Adjust seasoning:
Taste and adjust salt and pepper. Remember that the pickles are already salty, so add salt cautiously. - Let it rest:
Cover the bowl with plastic wrap and refrigerate for at least 2-3 hours, or even better, overnight. This step is crucial for the flavors to meld and the Russian salad to reach its perfect consistency. - Serve:
Before serving, give it one last gentle stir. You can decorate with a few fresh parsley leaves or a caper.
Tips and Frequently Asked Questions About Russian Salad
Here are some of the questions I'm most often asked. I hope they're helpful!
Can I use frozen vegetables?
Yes, you can use a frozen Russian salad vegetable mix, but make sure they are of good quality. Cook them according to instructions and, as always, drain and cool them very well before using.
How can I make the mayonnaise lighter?
If you want a lighter version, you can replace part of the mayonnaise with unsweetened natural Greek yogurt (about 1/3 yogurt and 2/3 mayonnaise). It will add a note of freshness and lighten the dish.
How long does Russian Salad keep in the fridge?
Russian Salad keeps in the refrigerator, well covered, for 2-3 days. It's perfect to prepare in advance for a special lunch or dinner.
Can I add other ingredients?
Certainly! The classic recipe is already perfect, but you can customize it. Some people like to add well-drained canned tuna, shredded boiled chicken breast, or even chopped hard-boiled eggs. Experiment, but always with balance!
Why is my Russian salad watery?
There are two main reasons: the vegetables were not drained well after cooking, or the pickles were not squeezed enough. Always make sure all ingredients are well-drained and cold before mixing them with mayonnaise.
A Masterpiece of Flavor and Tradition
There you have it! Now you hold not just a recipe, but all the secrets to bring to the table a Russian Salad that will make everyone's eyes light up and delight their palate. A dish that tastes of home, tradition, and love, capable of evoking the most beautiful memories.
Don't be afraid to challenge yourself. Cooking is an act of love, and with this guide, success is guaranteed. Every forkful will be a journey into authentic flavor and perfect creaminess.
Have you tried our recipe? We're curious to see your masterpiece! Leave a comment below, tell us how it went, or share a photo on Instagram tagging @CercaRicette.it. If you loved this Russian Salad, you can't miss our recipe for Perfect Homemade Mayonnaise or another classic like Vitello Tonnato.