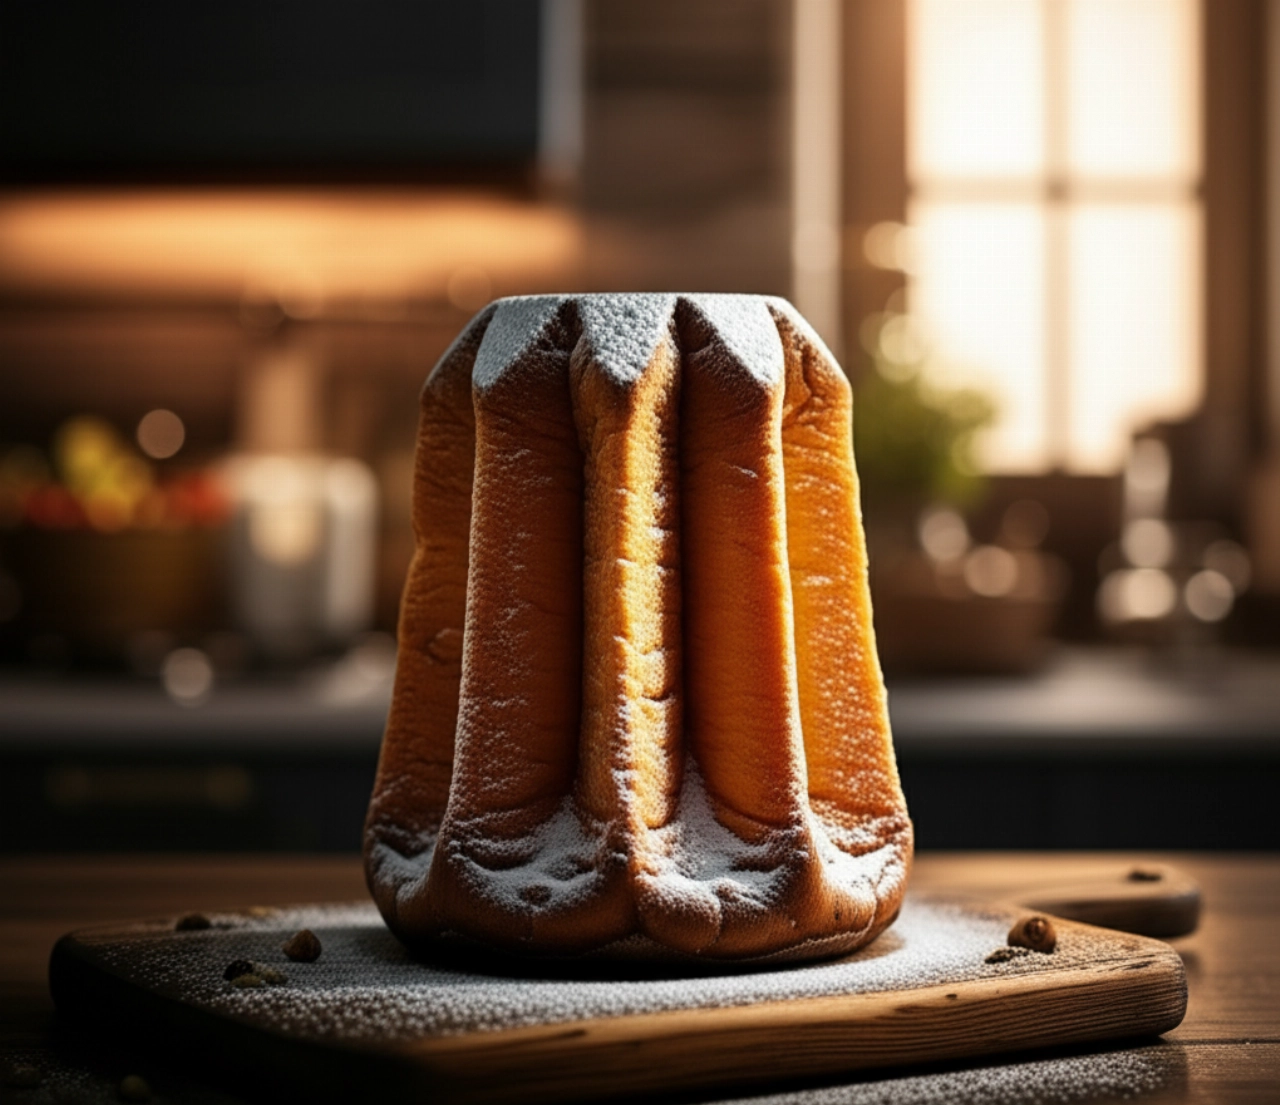
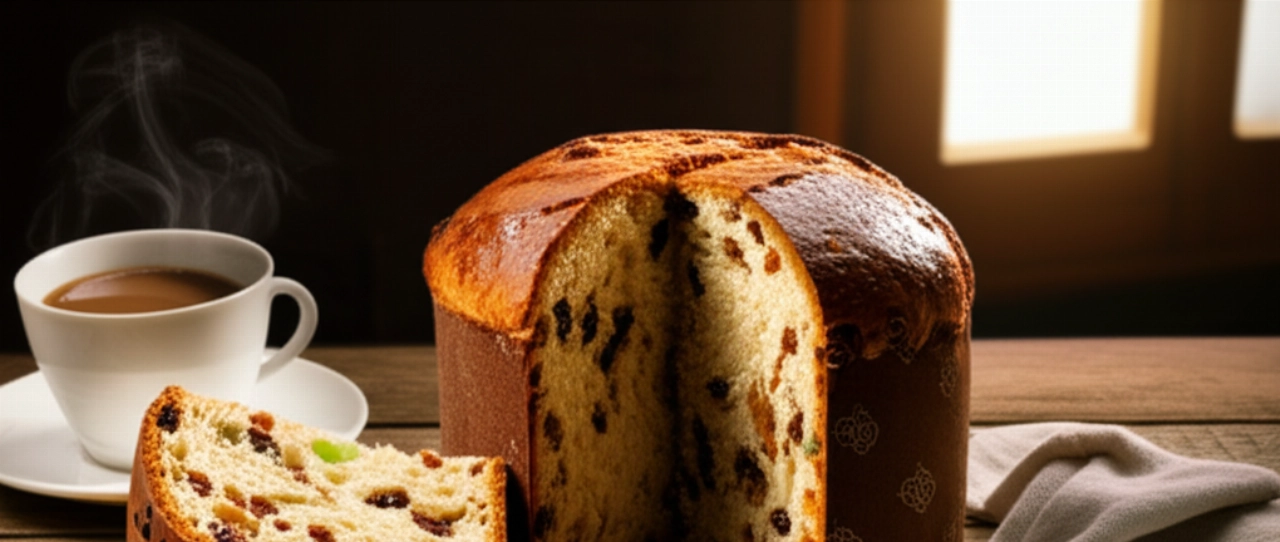
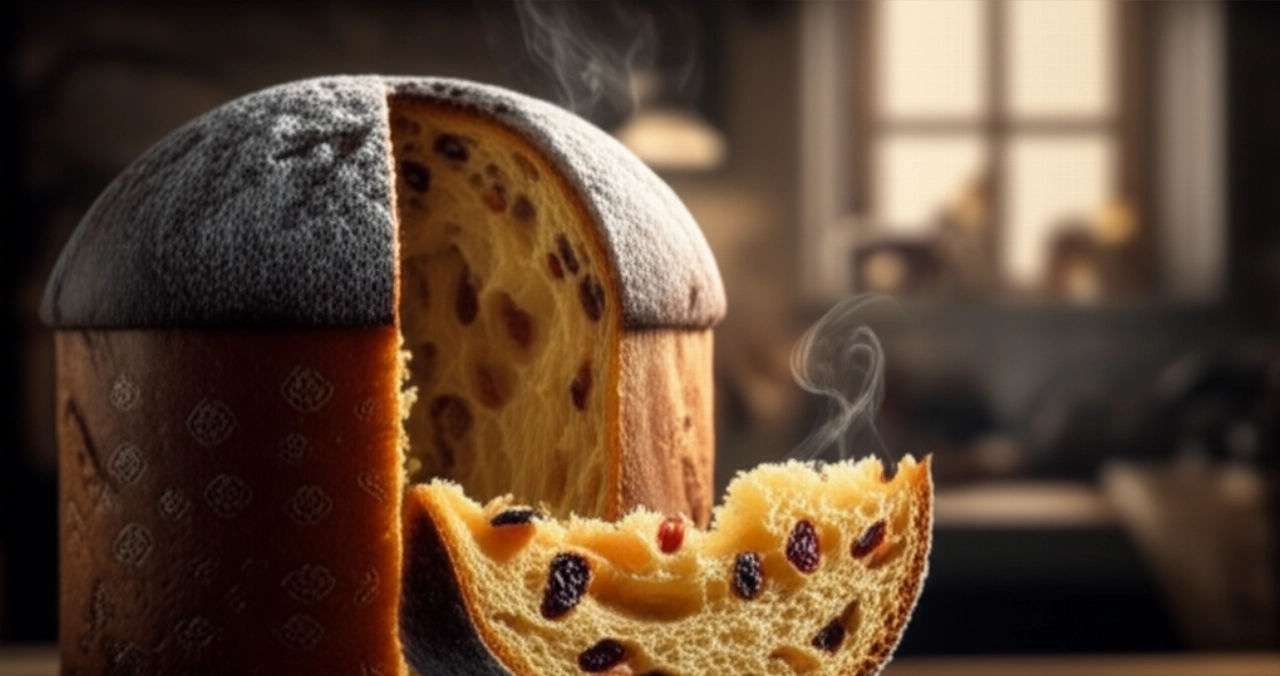
Dreaming of bringing a homemade Panettone to your holiday table that smells of butter, citrus, and vanilla? A Panettone so soft it melts in your mouth, with a tall, golden dome and an interior rich with candied fruit and raisins? A true masterpiece that will make you feel like a true guardian of tradition, just like grandma?
Perhaps you've tried in the past, and the result wasn't what you hoped for: a dough too tough, a leavening that wouldn't start, or a dessert that lacked flavor. The fear of wasting precious time and ingredients, especially at Christmas, is more than legitimate. Finding the right recipe, one that guarantees success without performance anxiety, seems like a challenge.
Make yourself comfortable, because your search is over. Here you won't just find a list of ingredients, but the definitive guide, full of tricks and tips, to prepare the softest, most fragrant, and most successful homemade Panettone of your life. I will guide you step by step, revealing every secret for a result that will make you say: "This is the only recipe I'll ever need. Here I feel at home." Success is guaranteed, and applause will not be lacking!
The Secret Ingredients for a Masterful Homemade Panettone
The magic of Panettone begins with the choice of ingredients. It's not just a list, but a careful selection that makes the difference between a good dessert and a masterpiece.
- Strong Flour (Manitoba or W350-380): This is the true star. Its high protein (gluten) percentage is essential for creating that robust gluten network that allows the dough to trap air and support long leavening, giving you a tall, soft Panettone. Do not use weak flours, or your Panettone will "collapse."
- Refreshed and Active Sourdough Starter (or Fresh Brewer's Yeast): Sourdough starter is the soul of traditional Panettone, imparting complex aromas and longer shelf life. If you don't have it, don't worry! I'll also give you instructions for brewer's yeast, which will still allow you to achieve an excellent result, perhaps with a slightly different but always delicious aroma.
- High-Quality Butter (82% fat): Butter is the heart of softness and flavor. Choose dairy butter, preferably Bavarian or with a high fat percentage. It should be soft, like an ointment, but not melted, to be perfectly incorporated into the dough.
- Very Fresh Eggs (yolks): We use only yolks for richness, golden color, and creaminess. Egg whites would make the dough gummier and less soft. Make sure they are at room temperature.
- Sugar: Not only sweetens, but also aids leavening and crust coloration.
- Honey (or Malt): A small touch that helps leavening, makes the dough more elastic, and contributes to browning and shelf life.
- Salt: Balances flavors and strengthens the gluten network. Never forget it!
- Candied Orange and Citron, Raisins: Choose quality candied fruit, soft and fragrant. Raisins must be rehydrated so they don't "steal" moisture from the dough. If you don't like candied fruit, you can increase the amount of raisins or add chocolate chips.
- Natural Flavors (Vanilla, citrus zest): Essential for the unmistakable aroma of Panettone. Use vanilla beans, untreated orange and lemon zest.

Homemade Panettone: The 3 Common Mistakes to Absolutely Avoid
Preparing Panettone might seem like a challenge, but by knowing the most common mistakes, you're already halfway there. I'll protect you from these "pitfalls"!
- Not Respecting Leavening Times and Temperatures: Haste is the enemy of Panettone. Each leavening phase has its precise times and requires a constant temperature (ideally 26-28°C). If the environment is too cold, the dough won't rise; if it's too hot, it will rise too quickly and then "collapse." Be patient, observe the dough, not the timer!
- Not Kneading the Dough Properly (Incordatura): Incordatura is the crucial moment when the flour develops gluten, creating an elastic and resistant network. If the dough is not well-kneaded (i.e., it doesn't detach from the mixer walls and doesn't form a thin membrane when stretched), the Panettone will be compact and less airy. Work the dough for a long time, adding fatty ingredients (butter) little by little, only when the previous addition has been completely absorbed.
- Opening the Oven Too Early During Baking: The temptation to peek is strong, I know! But opening the oven in the first 30-40 minutes of baking can cause the Panettone to deflate due to the thermal shock. Resist! The dome will form and stabilize only after some time.
Grandma's Magic Touch: The Secret to a Panettone that 'Sings'
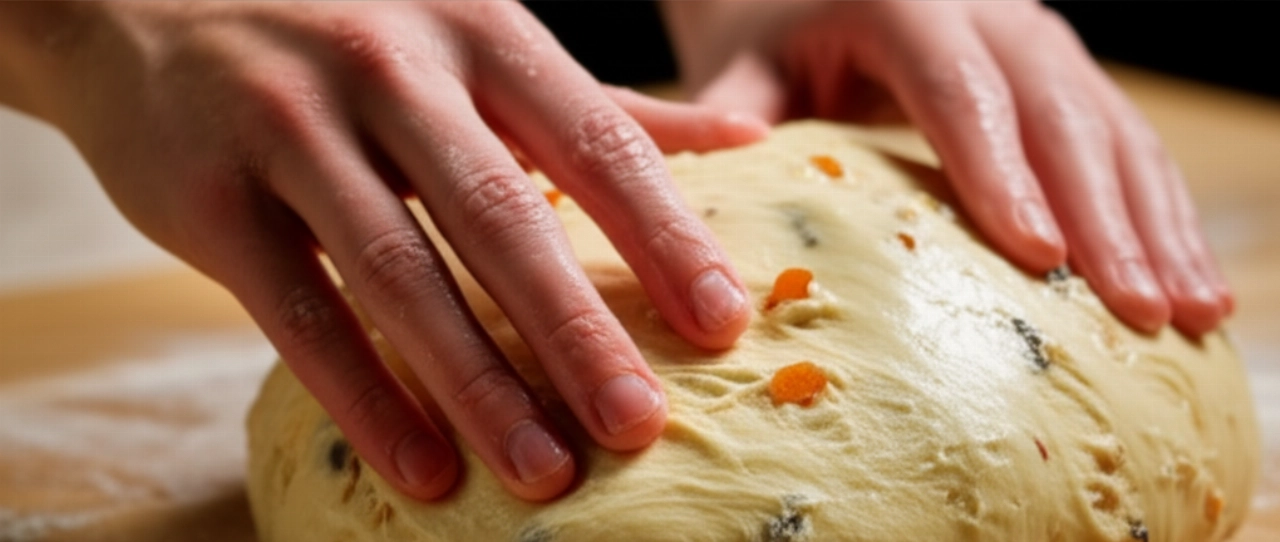
My grandmother, when she prepared Panettone, had a ritual. She always said: "Panettone is not just flour and eggs, it's patience and a touch of magic." And her secret, which she passed down to me, was the "pirlatura". It's not just a technical term, it's a gesture of love.
After the last proofing, before placing the dough in the mold, grandma would gently turn it out onto a lightly buttered work surface and, with her hands, "pirlava" it. This means rolling it on itself, with a circular motion from bottom to top, as if you wanted to create a perfect, smooth ball, pulling the surface of the dough downwards and making it adhere to the base. This gesture creates surface tension, which helps the Panettone develop uniformly in height and form that perfect dome we all admire. It's a small trick that makes a huge difference in the final structure of your dessert. Try it, and you'll hear your Panettone "sing"!
Let's Prepare Your Homemade Panettone Together: The Step-by-Step Guide
Here's the recipe that will guide you, without fear, to your perfect Panettone. Arm yourself with patience and love, the result will reward you!
Ingredients for a 1 kg Panettone (1 kg mold)
- Manitoba Flour (W350-380): 450 g
- Refreshed and active sourdough starter: 150 g (or 10 g fresh brewer's yeast)
- High-quality butter (82% fat): 180 g + 20 g for the surface
- Granulated sugar: 150 g
- Fresh egg yolks: 120 g (approx. 6-7 yolks)
- Water: 100 ml
- Acacia honey: 1 teaspoon (approx. 10 g)
- Fine salt: 5 g
- Sultana raisins: 100 g
- Candied orange and citron: 80 g
- Grated zest of 1 untreated orange
- Grated zest of 1 untreated lemon
- 1 vanilla bean (seeds only)
Necessary Tools
- Stand mixer with dough hook (highly recommended for kneading)
- Kitchen thermometer
- 1 kg Panettone mold
- Cooling racks
- Long skewers or knitting needles
Method: The Magic in the Kitchen
1. The First Dough (Previous Evening)
- Prepare the flavors: In a small bowl, mix the raisins (previously soaked in warm water and well squeezed) with the candied fruit, grated zest, and vanilla bean seeds. Cover and let rest.
- Activate the yeast: If using sourdough starter, ensure it is well refreshed and active. If using brewer's yeast, dissolve it in 100 ml of lukewarm water (not hot, max 30°C) with the honey.
- Start the dough: In the stand mixer bowl, place 150 g of flour, the yeast (sourdough or dissolved in water), 50 g of sugar, and 50 ml of water (if using sourdough, otherwise all the water with the brewer's yeast). Knead with the dough hook at low speed for about 5-7 minutes, until you get a homogeneous dough.
- Add the yolks and butter: Add 30 g of yolks (approx. 1-2) and 30 g of soft butter, one piece at a time, waiting for each addition to be completely absorbed before proceeding with the next. The dough should be smooth and well-kneaded.
- First proofing: Transfer the dough to a lightly buttered bowl, cover with plastic wrap, and let it proof at 26-28°C for about 10-12 hours (or until it triples in volume). You can use an oven with the light on or a warm spot in your house.
2. The Second Dough (Following Morning)
- Prepare the ingredients: Ensure all ingredients (butter, yolks) are at room temperature.
- Reactivate the dough: In the stand mixer, combine the risen first dough with the remaining 300 g of flour, 100 g of sugar, and salt. Knead at low speed for about 10 minutes, until a new gluten network forms.
- Incorporate the yolks: Add the remaining 90 g of yolks, a little at a time, waiting for each addition to be well absorbed before the next. The dough will become soft and shiny.
- Add the butter: Now, incorporate the remaining soft butter (150 g), in small pieces, always one piece at a time. This is the longest and most delicate step: the dough must absorb all the butter and return to being perfectly kneaded, elastic, and shiny. This could take 20-30 minutes. Don't rush!
- Add the candied fruit and raisins: When the dough is well-kneaded, add the previously prepared flavors (candied fruit, raisins, zest, vanilla). Knead only long enough to distribute them uniformly, without damaging the gluten network.
3. The Pirlatura and Second Proofing
- Pirlatura: Turn the dough out onto a lightly buttered work surface. With your hands, perform the pirlatura as grandma taught you: roll the dough on itself, pulling the surface downwards to create a smooth and taut ball.
- Into the mold: Gently transfer the pirlato dough into the 1 kg Panettone mold.
- Second proofing: Cover the mold with a damp cloth or plastic wrap and let it proof at 26-28°C. This phase is crucial and can last from 4 to 8 hours, or until the dough almost reaches the edge of the mold (about 1-2 cm below). Patience is golden!
4. Baking and Cooling
- Preheat the oven: When the dough is almost at the edge, preheat the static oven to 170°C.
- Score and bake: With a sharp razor blade or small knife, make a cross incision on the surface of the Panettone. In the center of the cross, place a small piece of butter (the remaining 20g).
- Baking: Bake the Panettone. Cook for about 50-60 minutes. If the surface browns too much, cover with aluminum foil. To ensure it's cooked through, the internal temperature of the Panettone must reach 92-94°C (use a kitchen thermometer).
- Upside-down cooling: Immediately after baking, skewer the Panettone at the base with the appropriate skewers (or knitting needles) and hang it upside down between two chairs or supports. This prevents the Panettone from deflating and maintains its softness. Let it cool completely (even for several hours or overnight).
Tips and Frequently Asked Questions about Homemade Panettone
Here are some of the questions I get asked most often, with answers to clear up any doubts!
Can I use brewer's yeast instead of sourdough starter?
Yes, absolutely! The recipe has been adapted for both. Panettone made with brewer's yeast will still be delicious, although with a slightly different aromatic profile and shorter shelf life compared to one made with sourdough starter. Follow the specific instructions for quantities and proofing times.
How do I store homemade Panettone?
Once completely cool, wrap the Panettone in plastic wrap or a tightly sealed food-grade plastic bag. It will stay soft and fragrant for 5-7 days at room temperature. If made with sourdough starter, even for 10-15 days. You can also freeze it sliced or whole, well wrapped, to enjoy later.
Why is my Panettone dry or gummy?
A dry Panettone can be due to overbaking (always check the internal temperature!) or insufficient dough hydration. Gummy, on the other hand, might indicate imperfect kneading or too much flour. Remember: the dough should be elastic and silky.
Can I add other flavors or ingredients?
Of course! Cooking is creativity. You can add candied lemon zest, dark chocolate chips, orange paste, or even a little liqueur (like rum or Grand Marnier) to the raisins during soaking. Experiment, but don't overdo the quantities so as not to alter the dough's balance.
Can I prepare the dough in advance?
The recipe is already designed for two days to best manage the proofing times. It is not advisable to prepare the dough too far in advance and store it in the fridge for longer than indicated, because long proofing times require constant yeast activity at controlled temperatures.
Your Masterpiece is Ready!
There you have it! Now you no longer just have a recipe, but all the secrets to bring a Panettone to your table that tastes of home, tradition, and love. A dessert that is not just a dessert, but a symbol of the holidays, a warm and fragrant hug.
Don't be afraid to experiment. Cooking is a gesture of creativity and generosity. But start with this solid base and you'll see that applause, smiles, and "Wow, it's delicious!" will not be lacking. It will be your most beautiful gift for the people you love.
Have you tried our recipe? We're very curious to see your masterpiece! Leave a comment below, tell us how it went, or share a photo on Instagram by tagging @CercaRicette.it. If you loved this Panettone, you can't miss our recipe for Homemade Pandoro or Christmas Cookies perfect to accompany coffee!