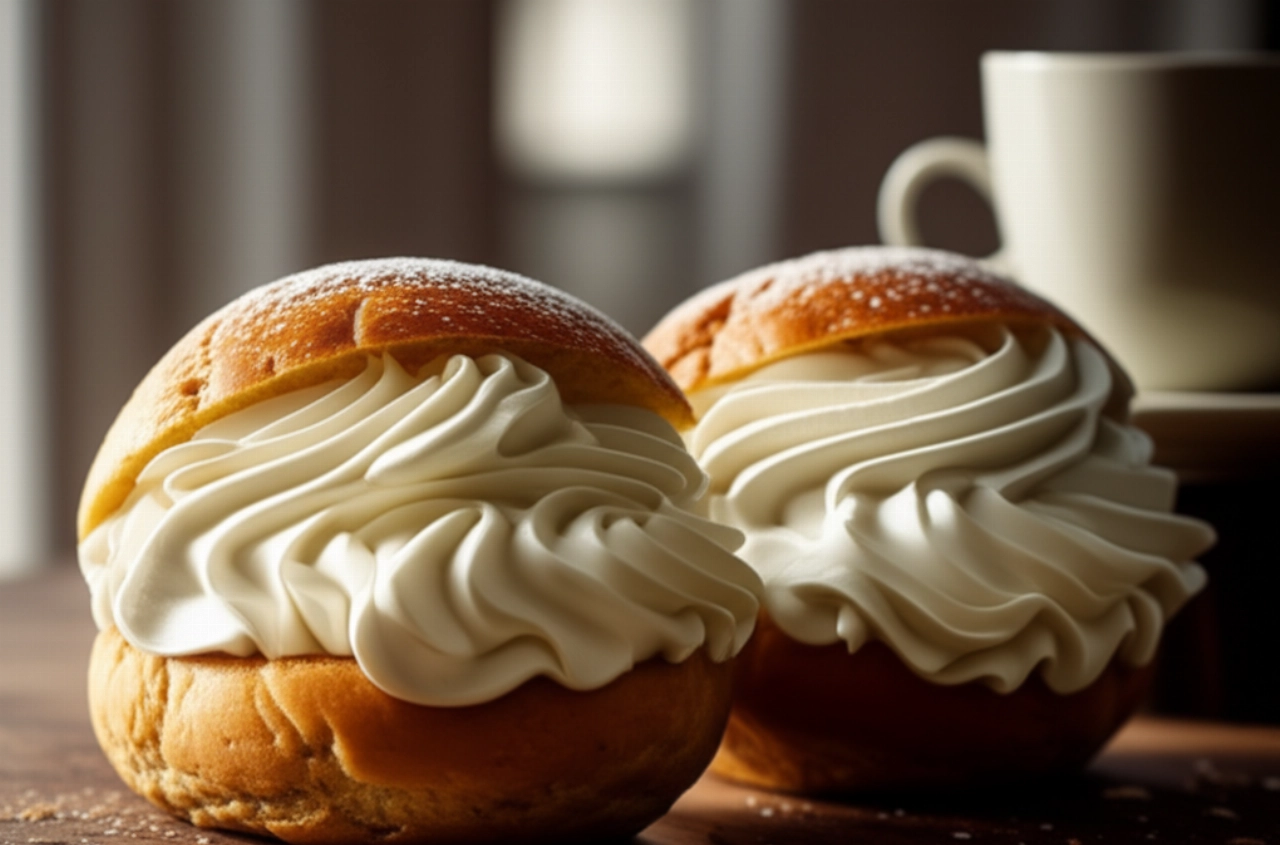
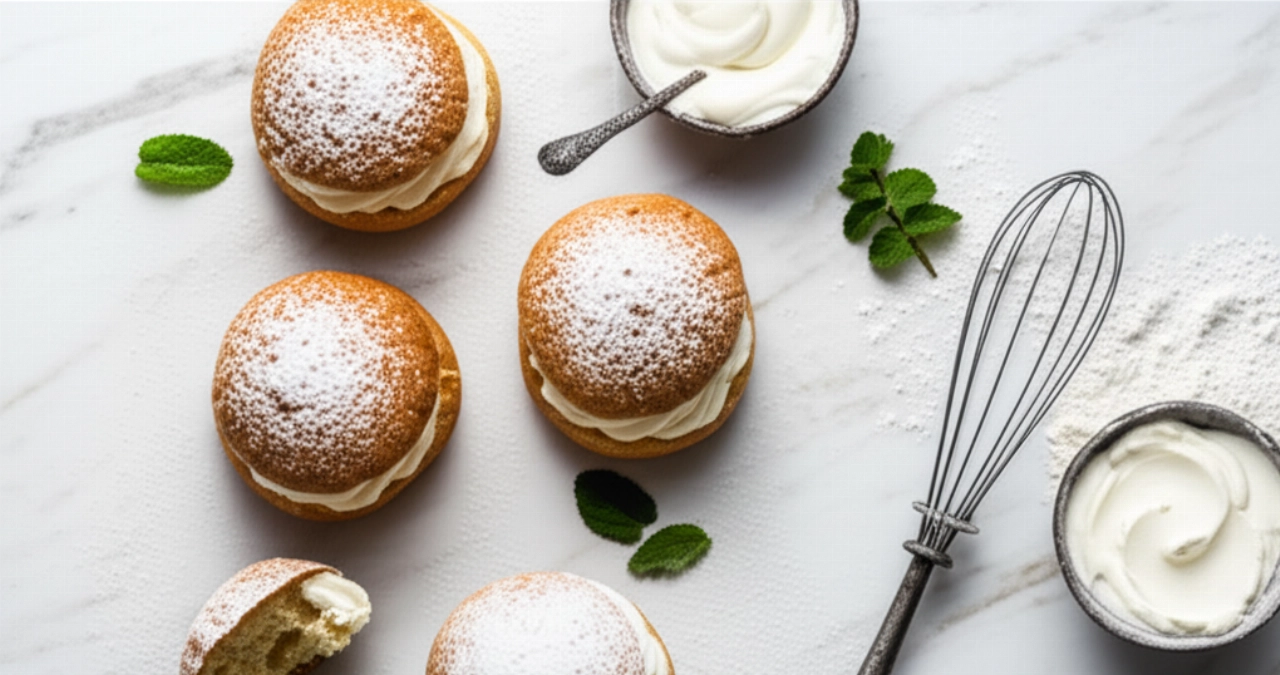
There's a scent that speaks of Rome, of Sunday breakfast, of sweet and unmistakable cuddles. It's the scent of maritozzi with cream, those little masterpieces of softness that make you close your eyes at the first bite. A sweet treat that immediately evokes smiles, memories, and the desire for another taste.
But how many times have you tried to make them at home and the result wasn't what you hoped for? Maybe too hard, not risen enough, or with cream that deflates quickly? Finding "the real" recipe, the one that makes you feel like you're in Rome, can seem like a daunting task, a labyrinth of doubts and uncertainties that make you fear wasting precious time and ingredients.
Don't worry, you're in the right place. Here at Search Recipes, your trusted kitchen, I'll reveal all the secrets to preparing maritozzi with cream so soft they'll seem like clouds, and a perfect, stable, and delicious whipped cream. Forget disappointments: success is guaranteed, and your table will be filled with applause! I'll guide you step by step to get incredibly soft maritozzi, light as a cloud, and a stable and delicious whipped cream, without lumps or collapses.
Smart Ingredients: The Choice That Makes the Difference for Perfect Maritozzi
It's not just a list, but a well-thought-out selection. Each ingredient has its reason and contributes to the final success of your maritozzi. Trust grandma!
- Manitoba Flour (or Strong Flour): It's the base of our dough. Manitoba, with its high protein content and strength (W), is essential for obtaining an elastic dough that can withstand long leavening times and result in incredibly soft and airy maritozzi. Do not use weak flours, otherwise your maritozzi risk being compact and gummy.
- Fresh Brewer's Yeast: The pulsating heart of leavening. Always choose fresh, block yeast, as it is more active and provides a greater boost. Make sure it is well preserved and not expired. If using dry yeast, check the doses on the package and always reactivate it in a little warm milk with a pinch of sugar.
- Whole Milk: Whole milk, lukewarm (not hot!), nourishes the yeast and makes the dough softer and richer. The fat in the milk contributes to the softness and preservation of the sweet bun. Avoid cold milk, which would inhibit the yeast's action.
- Granulated Sugar: Not only does it sweeten, but it's also the yeast's favorite "food," helping it to develop. Furthermore, it contributes to the browning of the crust and the softness of the dough. Don't overdo the quantities; the maritozzi shouldn't be cloyingly sweet.
- Fresh Eggs: At room temperature, please! Eggs enrich the dough, giving color, flavor, and greater softness. They also help bind the ingredients and retain moisture, extending the freshness of the maritozzi.
- High-Quality Butter: Soft, pomade-like. Butter is the ingredient that gives maritozzi that melt-in-your-mouth quality and unmistakable flavor. It should be added to the dough last, a small piece at a time, to be well absorbed and not compromise the gluten network.
- Honey (or Malt): A little secret! A teaspoon of honey (or malt) in the dough not only adds a touch of flavor but also aids leavening and makes the maritozzi even softer and moister, extending their freshness.
- Fresh Whipping Cream (at least 35% fat): The star of the filling! It must be very cold from the fridge and have a high fat percentage (at least 35%) to whip perfectly and remain stable. Without good cream, the maritozzo isn't the same.
- Powdered Sugar: To sweeten the cream and make it even more delicious.

3 Common Mistakes That Can Ruin Your Maritozzi (and How to Avoid Them)
Even the most experienced cooks can run into some snags. But with these tips, you'll be safe!
- Not Respecting Leavening Times: Haste is the number one enemy of leavened goods! If the dough doesn't rise enough, the maritozzi will be small, compact, and not very soft. Give the dough all the time it needs to double in volume, in a warm place without drafts. Be patient; patience is the key to success.
- Poor Dough Kneading: Dough that is not kneaded enough will not develop a good gluten network, resulting in a weak and inelastic dough. Conversely, over-kneaded dough can overheat and spoil. Knead until you obtain a smooth, elastic dough that detaches from the sides of the bowl (if using a stand mixer) or from your hands. It should be silky and homogeneous.
- Using Cold or Low-Quality Ingredients: Temperatures are crucial! Eggs, milk, and butter must be at room temperature (except for the cream for the filling, which must be very cold!). Cold ingredients slow down leavening and make the dough less homogeneous. And don't skimp on quality: good butter and good flour truly make a difference in the final result.
Grandma's Secret: That Extra Touch for Incredible Softness
My grandmother, when she made maritozzi, had a little trick that always impressed me. She used to say: "The dough must be like a cloud, light and fragrant." And to make it so, in addition to the honey I've already revealed to you, she had a meticulous attention to the final consistency of the dough. She taught me to do the "cloud test": when the dough was ready for the first rise, you had to touch it with a lightly floured finger. If the imprint remained, but the dough slowly sprang back, it was perfect. If it sprang back immediately, it needed to rest a little longer. If it didn't spring back at all, it was over-risen. This small gesture, which makes you feel the dough, will give you the certainty of having achieved the ideal consistency for unparalleled softness.
Let's Prepare Maritozzi with Cream Together: The Step-by-Step Guide
Ingredients:
- 500 g Manitoba flour (or strong flour, W 300-350)
- 150 ml lukewarm whole milk
- 15 g fresh brewer's yeast
- 80 g granulated sugar
- 2 medium eggs at room temperature
- 80 g soft, pomade-like butter
- 1 pinch of salt
- 1 teaspoon honey (or malt)
- Grated zest of 1 untreated lemon (optional, but recommended for aroma)
For the Glaze (Shiny Syrup):
- 50 ml water
- 50 g granulated sugar
For the Filling:
- 500 ml fresh whipping cream (at least 35% fat)
- 30-50 g powdered sugar (to taste)
Necessary Tools:
- Stand mixer with dough hook (or a large bowl and strong arms!)
- Various bowls
- Plastic wrap
- Baking sheet
- Parchment paper
- Pastry brush
- Electric whisk (for the cream)
- Piping bag with star tip (optional, but useful for filling)
Method:
- Prepare the Biga (the "engine" of the dough): In a small bowl, dissolve the fresh brewer's yeast in lukewarm milk (not hot, please! It should be just warm to the touch). Add a teaspoon of sugar taken from the total and 2 tablespoons of flour (also taken from the total). Mix well until you get a smooth batter. Cover with plastic wrap and let rest for about 15-20 minutes in a warm place, until small bubbles form on the surface: this means the yeast is active and ready to work!
- Start the Dough (with stand mixer or by hand):
- With Stand Mixer: In the bowl of the stand mixer, pour the remaining flour, sugar, honey, and grated lemon zest (if using). Add the activated biga. Begin kneading with the dough hook at low speed.
- By Hand: On a pastry board or in a large bowl, form a well with the flour, sugar, honey, and lemon zest. Pour the biga into the center. Begin incorporating the flour from the edges, mixing with a fork or your hands.
- Add the Eggs: Once the ingredients are roughly combined, add the eggs, one at a time, waiting for the first to be completely absorbed before adding the next. The dough will be sticky at first, which is normal! Continue kneading.
- Incorporate Salt and Butter: When the dough is more compact and begins to detach from the sides of the bowl (or your hands), add the salt. Then, begin incorporating the soft butter, a small piece at a time, waiting for each piece to be completely absorbed before adding the next. This step is crucial for the final softness. The dough will become smooth, elastic, and shiny. Continue kneading for at least 15-20 minutes with the stand mixer (or 25-30 minutes by hand), until you obtain a silky dough that no longer sticks to your hands and, when gently stretched, forms a thin membrane without tearing (windowpane test).
- First Rise (the "growth"): Form the dough into a ball and place it in a large, lightly oiled bowl. Cover with plastic wrap and let it rise in a warm place (for example, a turned-off oven with the light on) for about 2-3 hours, or until the dough has doubled in volume. This is the time for patience!
- Shape the Maritozzi: After the rising time, gently turn the dough out onto a lightly floured surface. Gently deflate it and divide it into portions of about 60-70 grams each. With each portion, form balls and then slightly elongate them to give them the classic oval shape of maritozzi. They should be somewhat elongated, not perfectly round.
- Second Rise (the "shape"): Arrange the maritozzi well-spaced on a baking sheet lined with parchment paper. Cover with a clean cloth or plastic wrap and let them rise again in a warm place for another 45-60 minutes, or until they have doubled in volume and appear puffy and light.
- Baking: Preheat a static oven to 180°C (350°F). Bake the maritozzi for about 15-20 minutes, or until they are golden brown on the surface and bottom. Every oven is different, so keep an eye on the browning.
- Prepare the Glaze (Shiny Syrup): While the maritozzi are in the oven, prepare the glaze. In a small saucepan, combine water and sugar. Bring to a boil and simmer for a couple of minutes, until the sugar has completely dissolved. Turn off the heat and let it cool slightly.
- Glaze the Maritozzi: As soon as they come out of the oven, while still warm, gently brush the surface of the maritozzi with the prepared syrup. This will give them an inviting shine and keep them soft longer. Let them cool completely on a wire rack.
- Whip the Cream: When the maritozzi are cold, it's time for the cream! Make sure the fresh cream is very cold from the fridge. Pour it into a bowl (the bowl and whisks can also be chilled in the freezer for 10 minutes, it's a grandma's trick!). Start whipping with electric beaters at medium speed. When it starts to thicken, add the powdered sugar a little at a time and continue whipping at a higher speed until the cream is firm and shiny. Don't over-whip it, otherwise it risks "breaking" and turning into butter!
- Fill the Maritozzi: With a sharp knife, make a deep cut in the center of each maritozzo, without cutting all the way through. Gently widen the opening and, with the help of a piping bag or simply a spoon, generously fill with whipped cream. You can also "spread" the cream on the edges of the cut for an even more delicious effect.
- Serve and Enjoy! Your maritozzi with cream are ready to be enjoyed. They are perfect for breakfast, a snack, or as a dessert after a meal.
Tips and Frequently Asked Questions about Maritozzi with Cream
Here are some answers to the most common doubts, to guarantee you flawless success.
- Can I prepare the dough in advance? Absolutely! After the first rise, you can gently deflate the dough, wrap it in plastic wrap, and store it in the refrigerator overnight (maximum 12-18 hours). The next day, take it out of the fridge at least an hour before working with it, shape the maritozzi, and proceed with the second rise and baking.
- How can I store maritozzi? Maritozzi filled with cream should be stored in the refrigerator and preferably consumed within 1-2 days. Without cream, you can store them at room temperature, in a paper bag or an airtight container, for 2-3 days. They can be slightly warmed before being filled to restore their full fragrance.
- Can I freeze maritozzi? Of course! You can freeze cooked and glazed maritozzi before filling them. Let them cool completely, then wrap them individually in plastic wrap and place them in a freezer bag. They can be stored for about 1-2 months. To thaw them, leave them at room temperature or warm them slightly in the oven.
- Why aren't my maritozzi soft? The most common causes are too weak flour, insufficient leavening (too cold, inactive yeast, or too short times), or dough not kneaded enough. Make sure to follow all steps, especially those related to leavening and dough kneading.
- Why does my cream deflate? Cream deflates if it's not cold enough, if it has too low a fat percentage (it must be at least 35%), or if it's whipped for too long (risking turning into butter) or too little. Make sure to use good quality, very cold fresh cream, and whip it until it's firm but still shiny.
A Sweet Hug That Tastes Like Home
There you have it! Now you don't just have a recipe, but all the secrets to bring maritozzi with cream to your table that will drive everyone crazy. A sweet treat that tastes of tradition, celebration, and love, capable of transforming a simple breakfast into a special moment, or a snack into an authentic Roman cuddle.
Don't be afraid to get to work. Every step is designed to guide you to success, dispelling every doubt and guaranteeing an impeccable result. Cooking is also about fun, experimentation, and the joy of seeing happiness in the eyes of those who taste your creations. Start with this solid foundation and you'll see that applause won't be lacking.
Have you prepared your maritozzi? We can't wait to admire your masterpiece! Leave a comment below, tell us about your experience, or share a photo on Instagram by tagging @CercaRicette.it. If you loved this recipe, don't miss our guide for a perfect creamy Tiramisù or the Fresh Fruit Tart for another sweet, home-scented treat!