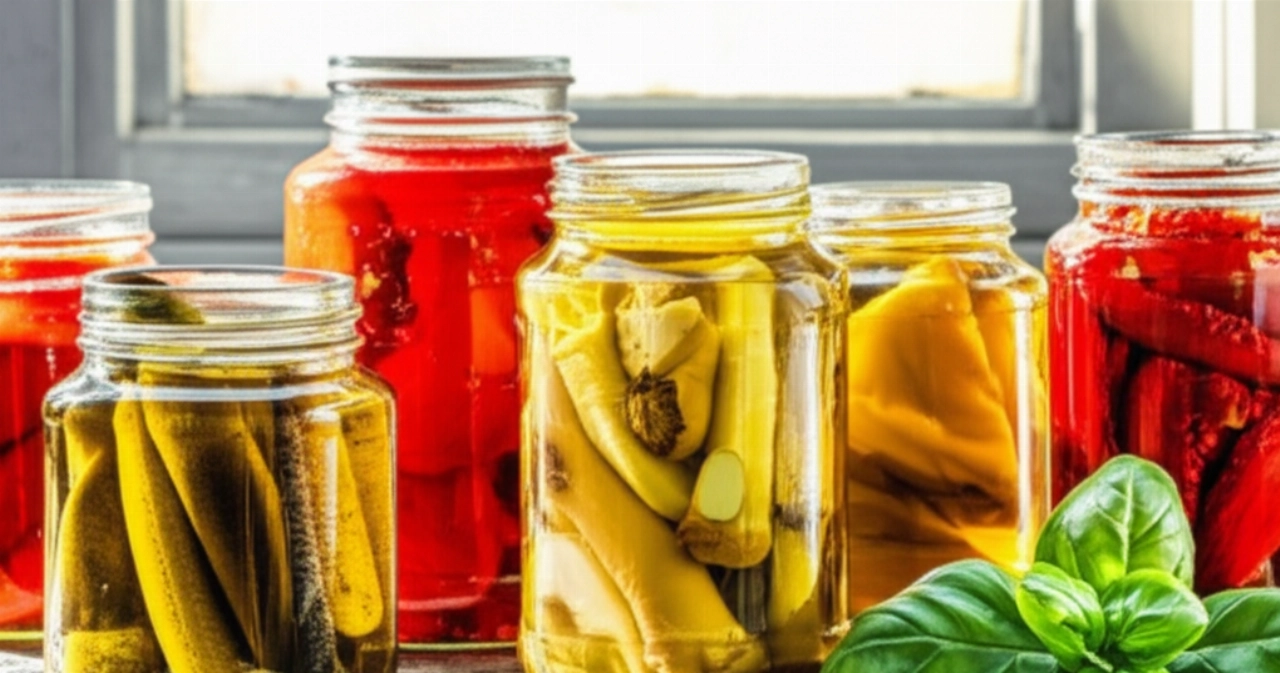
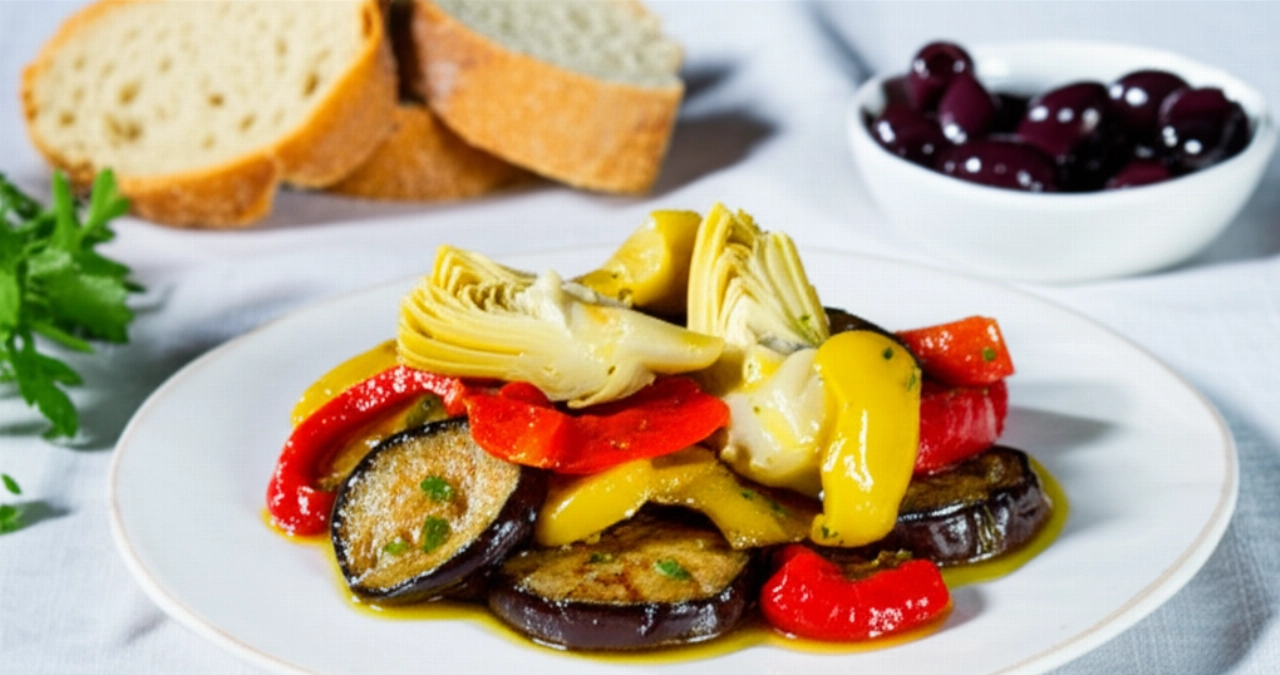
Imagine opening a jar and finding vegetables in oil so crispy you can hear the "crunch" with every bite, immersed in fragrant oil and ready to add a touch of sunshine and flavor to any dish. A delicious appetizer, a side dish that makes a difference, or simply a taste that takes you back to authentic flavors of yesteryear.
But how many times have you prepared them only to find them soft, bland, or, worse, to have doubts about their preservation? Finding the right recipe, one that guarantees not only taste but also safety, seems like a challenge.
Make yourself comfortable. Here you won't just find a list of ingredients, but the definitive guide, full of tricks and grandma's tips, to prepare the best vegetables in oil of your life. I'll reveal the secrets to always having them crispy, never soft, and for safe and long-lasting preservation, without surprises. Success is guaranteed, and your pantry will thank you!
Ingredients for Perfect Vegetables in Oil: The Choice That Makes All the Difference
The foundation of every culinary masterpiece is the ingredients. For your preserves, quality is everything. Here's what you need and why:
- Fresh, Seasonal Vegetables: Choose vegetables like carrots, cauliflower, bell peppers (red, yellow, green), green beans, small onions, celery. They should be firm, spotless, and brightly colored. Freshness is the first secret to final crispness.
- White Wine Vinegar: Good quality, with acidity that isn't too aggressive. It's essential not only for the sweet and sour taste but especially for the safety of the preserve, creating an unfavorable environment for bacteria.
- Water: Simple tap water, but if you prefer, you can use filtered water.
- Coarse Salt: For the brine and to enhance the flavor of the vegetables.
- Sugar: A pinch to balance the acidity of the vinegar and make the vegetables even brighter and tastier.
- Extra Virgin Olive Oil: Choose a delicate oil that doesn't overpower the vegetable flavor but enhances it. It will be the final "guardian" of your preserve.
- Aromatics (optional but recommended): Bay leaves, black peppercorns, cloves, a sprig of rosemary or thyme. These will give your vegetables in oil an unmistakable aroma.
3 Common Mistakes That Make Vegetables in Oil Soft (and How to Avoid Them)
Preparing vegetables in oil seems simple, but there are pitfalls that can ruin your work. Here are the most common mistakes and how to avoid them, to guarantee an impeccable result:
- Overcooking the Vegetables: This is the number one mistake that leads to soft and mushy vegetables. Vegetables should be blanched, not boiled for a long time! They must remain al dente, nice and firm and crispy. Cooking time varies from vegetable to vegetable, but it's always a matter of a few minutes.
- Insufficient Drying: After blanching, it's crucial that the vegetables are perfectly dry before being jarred. Even a minimal amount of residual water can compromise preservation and encourage mold formation. Spread them on a clean cloth and let them cool and dry completely.
- Inadequate Jar Sterilization: Safety first! Jars and lids must be impeccable. An improperly sterilized jar is a risk to your preserve. Make sure to follow a reliable sterilization method (boiling, oven, or high-temperature dishwasher) and handle the jars only with clean tongs.
Grandma's Secret for Crispy and Fragrant Vegetables in Oil
My grandmother, a true master of preserves, had a special touch that made her vegetables in oil legendary. "The vegetables must 'feel' the vinegar, but not 'drown' in its flavor," she always said with a smile. Her secret was twofold:
- The Sweet and Sour Balance: She always added a pinch of sugar to the water and vinegar mixture. Not to make the vegetables sweet, but to balance the acidity of the vinegar, making the flavor more harmonious and the vegetables even brighter and more inviting.
- Hidden Aromas: In addition to classic bay leaf and pepper, grandma always added a small whole dried chili pepper (if you like spicy) and a few fennel seeds. These gave a unique aroma and aftertaste, making her vegetables in oil unmistakable.
These small adjustments truly make a difference, transforming a good recipe into an unforgettable one.
Let's Prepare Vegetables in Oil Together: The Step-by-Step Guide
Now that we know all the secrets, let's get cooking! Follow these steps carefully, and success is guaranteed.
- Vegetable Preparation:
- Clean all vegetables thoroughly.
- Cut them into similarly sized pieces (e.g., carrots into thick rounds, cauliflower into florets, bell peppers into strips). This will ensure even cooking.
- The Perfect Blanching:
- In a large pot, bring 1 liter of water to a boil with 500 ml of white wine vinegar, 2 tablespoons of coarse salt, and 1 teaspoon of sugar. This is your sweet and sour brine.
- Blanch the vegetables, one type at a time, for a few minutes (e.g., carrots 3-4 min, cauliflower 2-3 min, bell peppers 2 min). They should remain nice and firm and crispy.
- Using a slotted spoon, drain the vegetables and immediately spread them out on a clean, dry cloth, well-spaced.
- Crucial Drying:
- Leave the vegetables on the cloth for at least 2-3 hours, or until they are completely cold and dry. You can also gently pat them with paper towels. This step is fundamental to prevent mold formation and ensure crispness.
- Sterilization and Jarring:
- Meanwhile, sterilize the glass jars and their lids. You can boil them for 10 minutes, put them in the oven at 130°C for 20 minutes, or use a high-temperature dishwasher cycle. Let them dry upside down on a clean cloth.
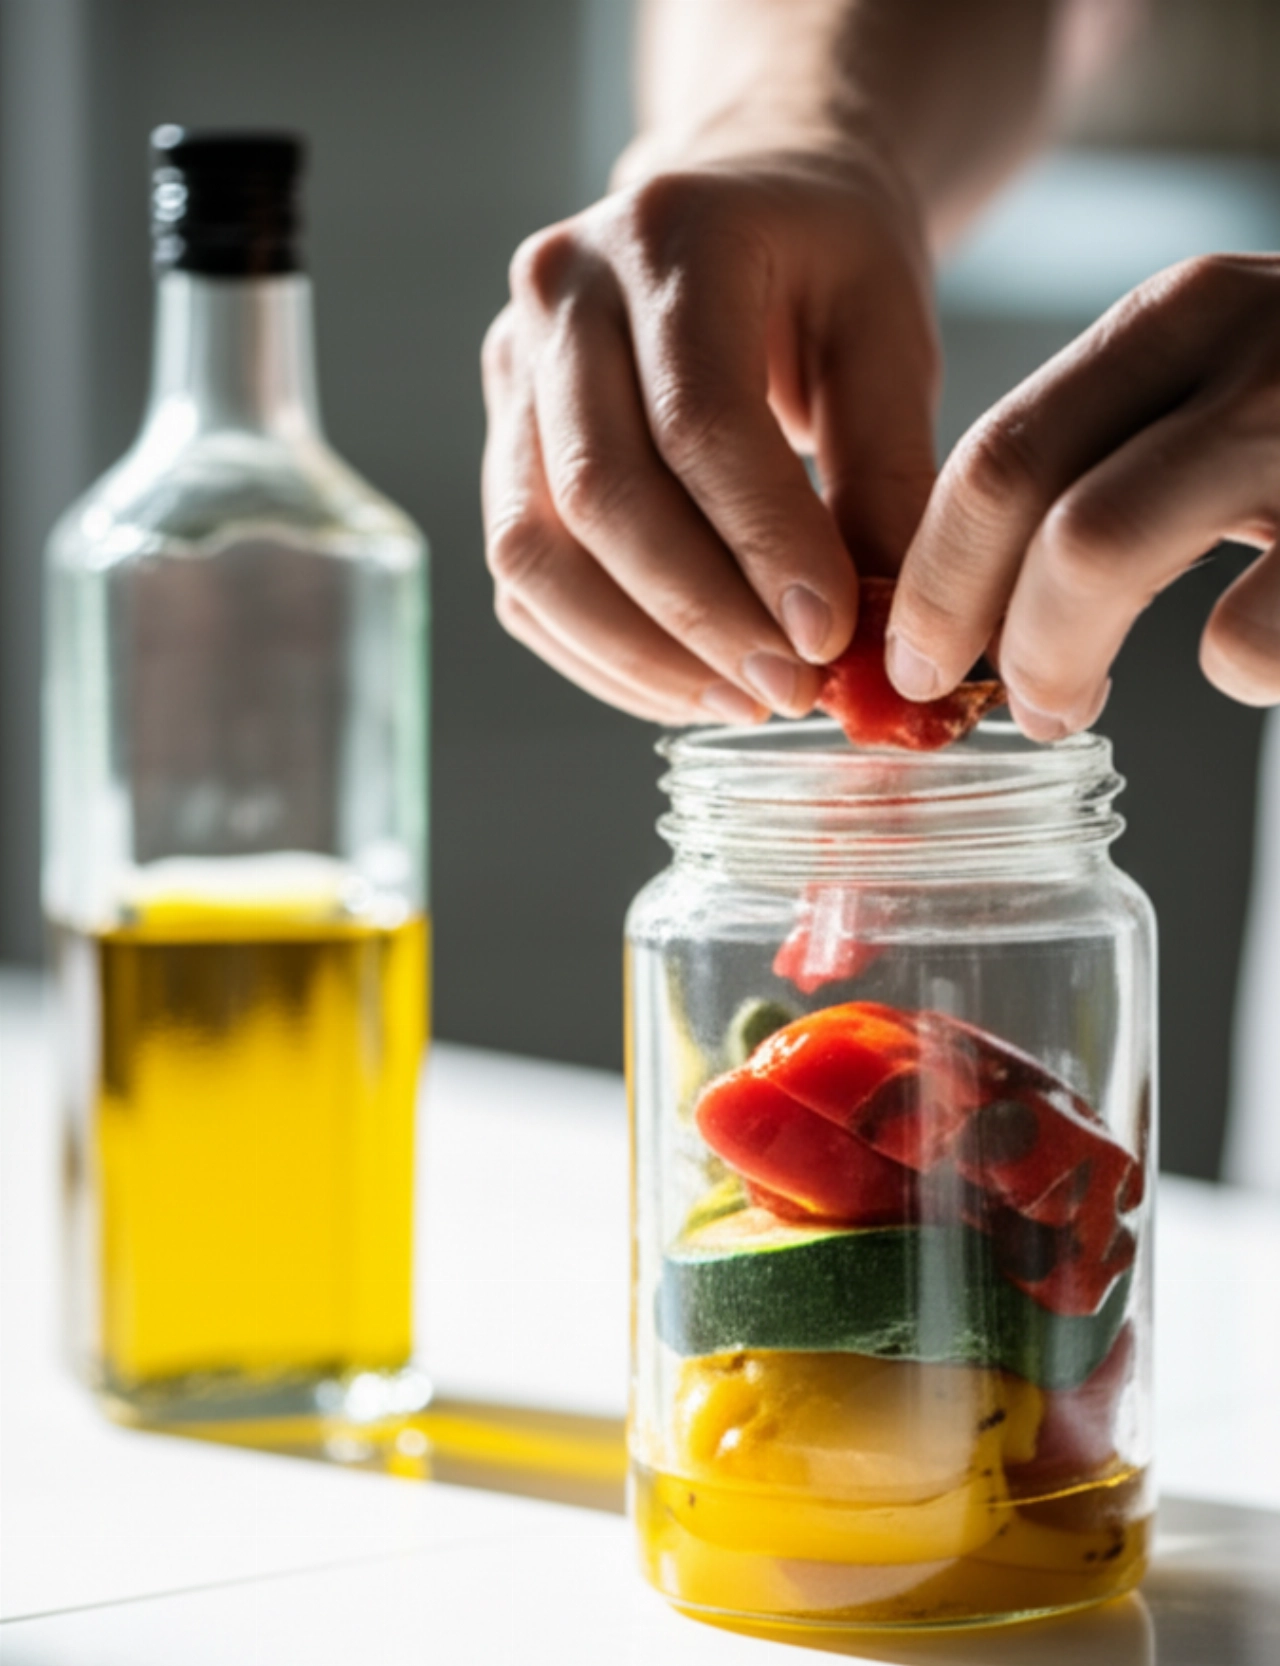
- When the vegetables are ready, fill the sterilized jars, alternating colors and types of vegetables. Add the aromatics (bay leaf, peppercorns, chili pepper) between the layers.
- Press the vegetables lightly with a spoon to remove any air bubbles.
- Covering with Oil and Sealing:
- Completely cover the vegetables with extra virgin olive oil, ensuring they are fully submerged and no air bubbles are trapped. If necessary, gently tap the jar on the work surface to make them rise.
- Leave a small space (about 1 cm) from the rim of the jar.
- Seal the jars hermetically with the sterilized lids.
- Pasteurization (for Extra Safety):
- For even safer and longer-lasting preservation, you can pasteurize the jars. Place them in a large pot, wrapped in cloths to prevent them from touching and breaking.
- Completely cover the jars with cold water and bring to a boil.
- Boil for about 20-25 minutes from the moment the water starts boiling.
- Turn off the heat and let the jars cool in the pot water.
- Storage:
- Once cool, check that the vacuum seal has formed (the lid should be concave and not make a "click-clack" sound).
- Label the jars with the preparation date.
- Store your vegetables in oil in a cool, dark, and dry place. They will be ready to enjoy after at least a couple of weeks, to allow the flavors to meld.
Tips and Frequently Asked Questions about Vegetables in Oil
Here are some of the most common questions I get asked about preparing vegetables in oil, with answers that will help you resolve any doubts:
- What vegetables can I use for vegetables in oil?
- You can use almost any vegetable you prefer, the important thing is that they are fresh and firm. The most common are carrots, cauliflower, bell peppers, green beans, small onions, celery, zucchini, eggplant. Experiment with the combinations you like best!
- How do I know if the jars are properly sterilized?
- After sterilization and drying, the jars must be impeccable. After pasteurization and cooling, the lid should be concave (indented inwards) and should not make the classic "click-clack" sound when pressed in the center. This indicates that a vacuum seal has formed, which is essential for safe preservation.
- How long do homemade vegetables in oil last?
- If prepared and pasteurized correctly, vegetables in oil can be stored in a cool, dark place for up to one year. Once the jar is opened, store it in the refrigerator and consume it within a few days, ensuring the vegetables are always covered with oil.
- Can I use only seed oil instead of extra virgin olive oil?
- Technically yes, but it is strongly discouraged. Extra virgin olive oil not only provides a superior and more authentic flavor but also has antioxidant properties that contribute to preservation. Seed oil, being more neutral, does not offer the same benefits in terms of taste and stability.
- Why did my vegetables in oil become soft?
- The most common causes are overcooking during blanching (the vegetables were already too soft before jarring) or insufficient drying. Residual water can make them soft and compromise crispness. Always ensure they are al dente and perfectly dry.
Your Masterpiece is Ready!
There you have it! Now you no longer just have a recipe, but all the secrets to bring vegetables in oil to your table that taste of home, tradition, and that crispness that makes you say "one after another." A small jar of joy that encapsulates the flavor of the garden and the wisdom of generations.
Don't be afraid to challenge yourself. Cooking is an act of love, and with this guide, success is guaranteed. Prepare your jars, fill your pantry, and enjoy the satisfaction of a job well done.
Have you tried our recipe? We're curious to see your masterpiece! Leave a comment below, tell us how it went, or share a photo on Instagram by tagging @CercaRicette.it. If you loved these vegetables in oil, you can't miss our recipe for Giardiniera Fatta in Casa for an even richer mix of flavors, or for a delicious appetizer like Peperoni Ripieni.