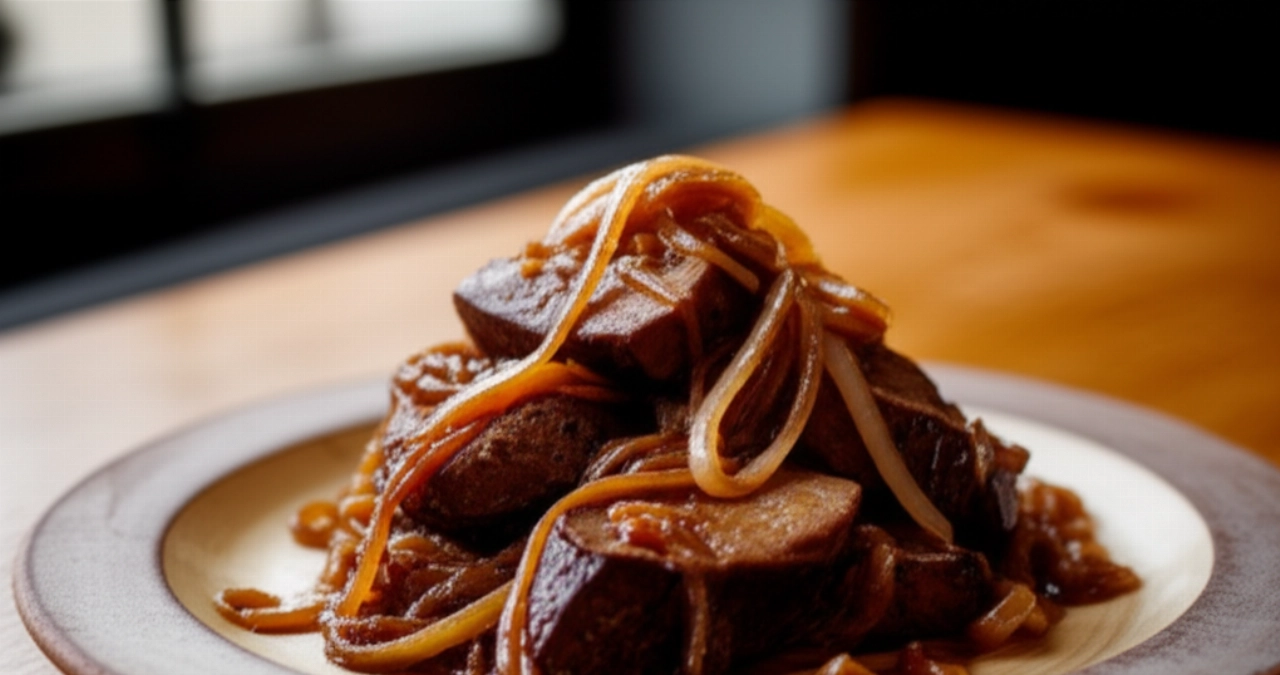
Dreaming of bringing a dish to the table that tastes of the sea, of history, and of that unique magic only Venice can offer? Sarde in Saor are much more than a simple appetizer: they are a journey of flavors, a perfect balance between sweet and sour, a masterpiece of Venetian cuisine passed down from generation to generation. But how many times have you feared not being able to balance the flavors, getting fish that's too soft, or a saor that's too aggressive?
Finding the authentic recipe, one that guarantees success and the unmistakable aroma of tradition, can seem like a challenge. Too many versions, too many doubts, and the fear of wasting precious ingredients. Make yourself comfortable. On this page, you won't just find a list of ingredients, but the definitive guide, full of tricks and tips, to prepare the best Sarde in Saor of your life. Success is guaranteed, and your palate will thank you!
Smart Ingredients: The Choice That Makes a Difference
For a saor that lives up to its name, ingredient quality is fundamental. It's not just about quantity, but about choosing carefully, just like the most experienced grandmother would.
- Very Fresh Sardines (approx. 1 kg): This is the heart of the dish. Choose small or medium ones, with firm flesh and bright eyes. Freshness is the only secret to a light and flavorful fry that pairs perfectly with the sweet and sour.
- White Onions (approx. 500-600 g): Not just any onion! White onions, like those from Chioggia or the sweet Tropea, are perfect. They are less aggressive and sweeter, ideal for creating that velvety sweet and sour base that will envelop the sardines. Slice them thinly, almost transparently.
- White Wine Vinegar (approx. 200 ml): Choose a good quality vinegar, not too strong. It's the element that will give the characteristic acidity, but it must be balanced. A too aggressive vinegar would overpower the delicate flavor of the sardines.
- Sultana Raisins (50 g): Rehydrate them in warm water for about ten minutes. Raisins add a natural sweetness that wonderfully contrasts with the vinegar, creating a sublime balance.
- Pine Nuts (30 g): Lightly toast them in a dry pan to enhance their aroma. They add a pleasant crunch and a resinous flavor that enriches the dish.
- All-Purpose Flour (as needed): For dusting the sardines before frying. It helps create a golden and crispy crust that seals in the fish's flavor.
- Sunflower (or Peanut) Oil for frying: A neutral oil with a high smoke point is essential for a perfect, light, and non-greasy fry.
- Extra Virgin Olive Oil (2-3 tablespoons): For stewing the onions. Choose a delicate oil that won't overpower the flavor.
- Salt and Black Pepper: Essential for enhancing all the flavors.
- Bay Leaves (2-3): They add an aromatic scent and aid preservation.
The 3 Mistakes That Make Sarde in Saor Less Than Perfect (and How to Avoid Them)
Even the simplest dishes hide pitfalls. Here are the common mistakes that prevent you from achieving perfection, and how I, your chef friend, will guide you to avoid them:
- Excessive or Incorrect Frying of Sardines: If the sardines are overcooked or fried in oil that's not hot enough, they will become tough and dry, or they will soak up too much oil. The secret is quick frying at a constant temperature (around 170-175°C / 338-347°F), until they are golden and crispy on the outside, but still tender inside. Don't overcrowd the pan!
- Imbalance Between Vinegar and Sweetness: A saor that's too sour or too sweet ruins the entire dish. The mistake is not tasting the onions while they stew and not balancing the vinegar well with the raisins. Remember, vinegar should be added off the heat or on very low heat to prevent it from evaporating too quickly and losing its pungent note.
- Lack of Resting Time: Sarde in Saor are not a dish to be eaten immediately! The biggest mistake is rushing. The saor needs time, at least 24 hours in the refrigerator, to allow the flavors to meld, for the fish to absorb the sweet and sour, and to become incredibly tender. It's a dish that improves with time, so patience is your best ally.
The Extra Touch: My Grandmother's Advice
My grandmother, a true Venetian cooking master, always told me: "Saor is like a good wine; the older it gets, the better it becomes, but only if you treat it with love from the beginning." Her secret for a truly unforgettable saor was the very slow, almost caramelized cooking of the onions. They shouldn't just be stewed, but almost confit, sweet and transparent, without taking on color. This process, which requires patience and very low heat for at least 20-30 minutes, is the basis for a deep and enveloping sweet and sour, which doesn't need added sugar because all the sweetness comes from the onion itself. It's the true heart of saor, and few do it with due attention.
Let's Prepare Sarde in Saor Together: The Step-by-Step Guide
Now that we have all the secrets, let's get cooking! I'll guide you step by step, without rushing, for an impeccable result.
1. Cleaning and Preparing the Sardines:
- Clean the sardines: Remove heads and guts. You can choose to leave them whole or butterfly them, removing the central bone. Rinse them well under cold running water and dry them carefully with paper towels. This step is crucial for good frying.
- Flouring: Dredge the sardines in all-purpose flour, shaking off any excess. They should be lightly floured, not breaded.
2. The Perfect Fry:
- Heat the oil: In a large pan, pour in plenty of seed oil (about 2-3 fingers deep). Bring it to a temperature of about 170-175°C (338-347°F). You can check by dipping a toothpick: if bubbles form around it, it's ready.
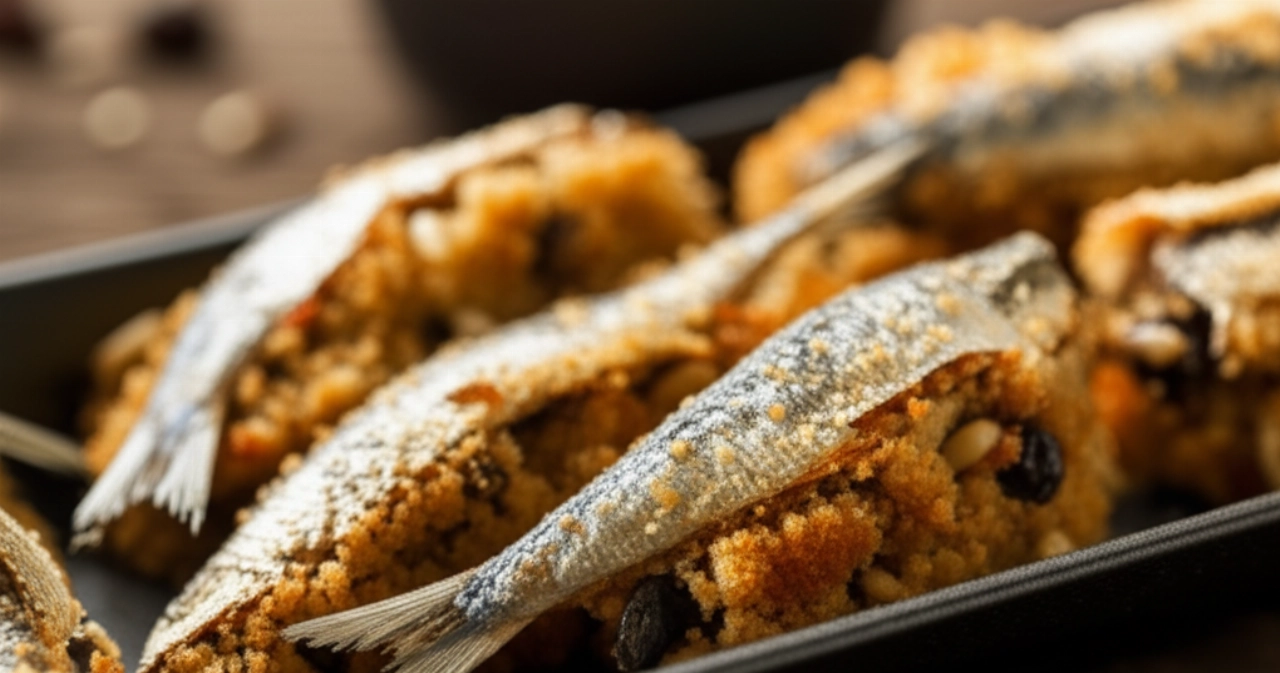
- Fry the sardines: Fry the sardines a few at a time so as not to lower the oil temperature. They should become golden and crispy, about 2-3 minutes per side.
- Drain and salt: With a slotted spoon, drain the sardines and place them on paper towels to remove excess oil. Lightly salt immediately after frying.
3. Preparing the Saor:
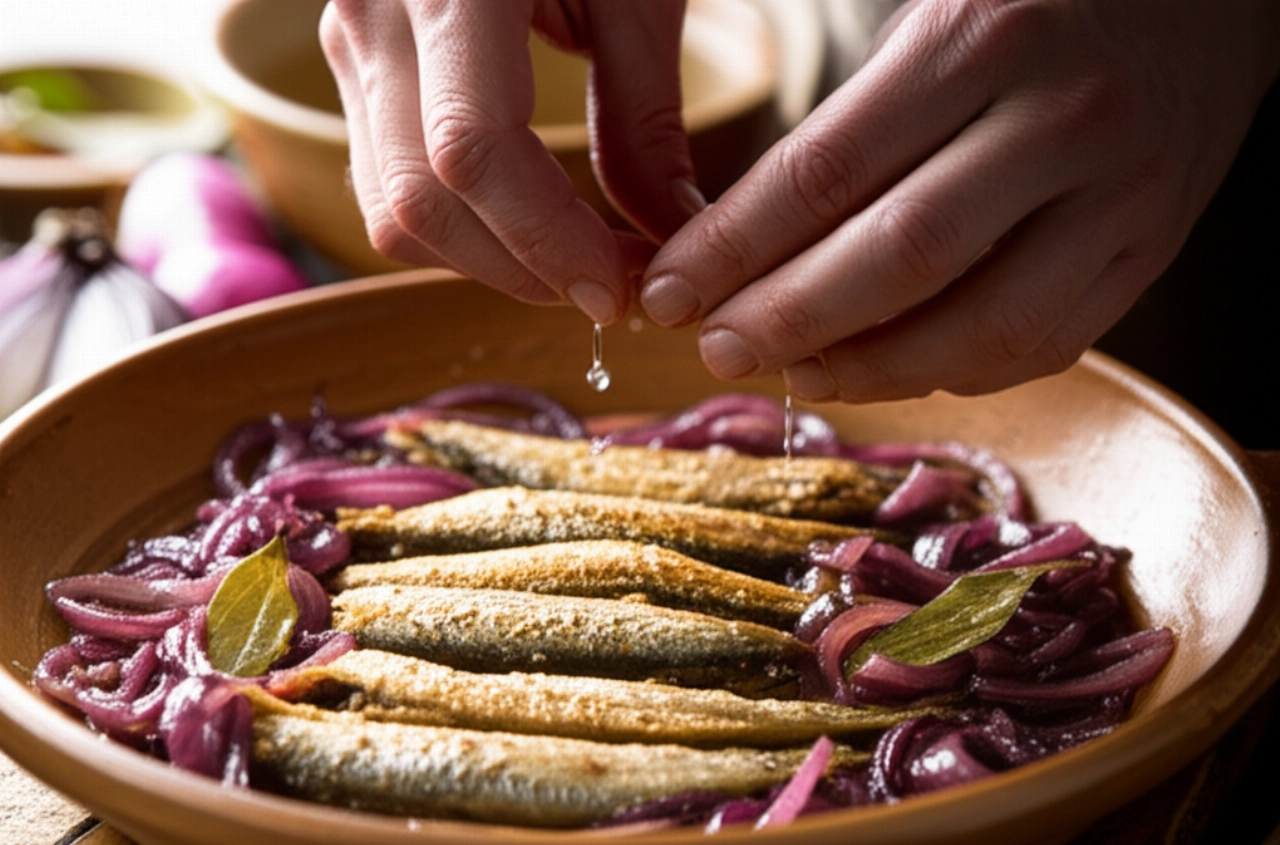
- Stew the onions: In a large saucepan, heat 2-3 tablespoons of extra virgin olive oil. Add the thinly sliced onions and a pinch of salt. Cover and let them stew over very low heat for at least 20-30 minutes, stirring occasionally. The onions should become transparent and very soft, almost creamy, without taking on color. This is the base of the saor's natural sweetness.
- Add the aromatics: When the onions are ready, add the raisins (well-squeezed from their soaking water), toasted pine nuts, and bay leaves. Mix well.
- Deglaze with vinegar: Remove the saucepan from the heat or lower the flame to minimum. Pour in the white wine vinegar. Return to the heat for a couple of minutes, just long enough for the alcoholic part to evaporate, but without letting the vinegar lose its pungent note. Taste and, if necessary, adjust for salt and pepper.
4. Assembly and Resting:
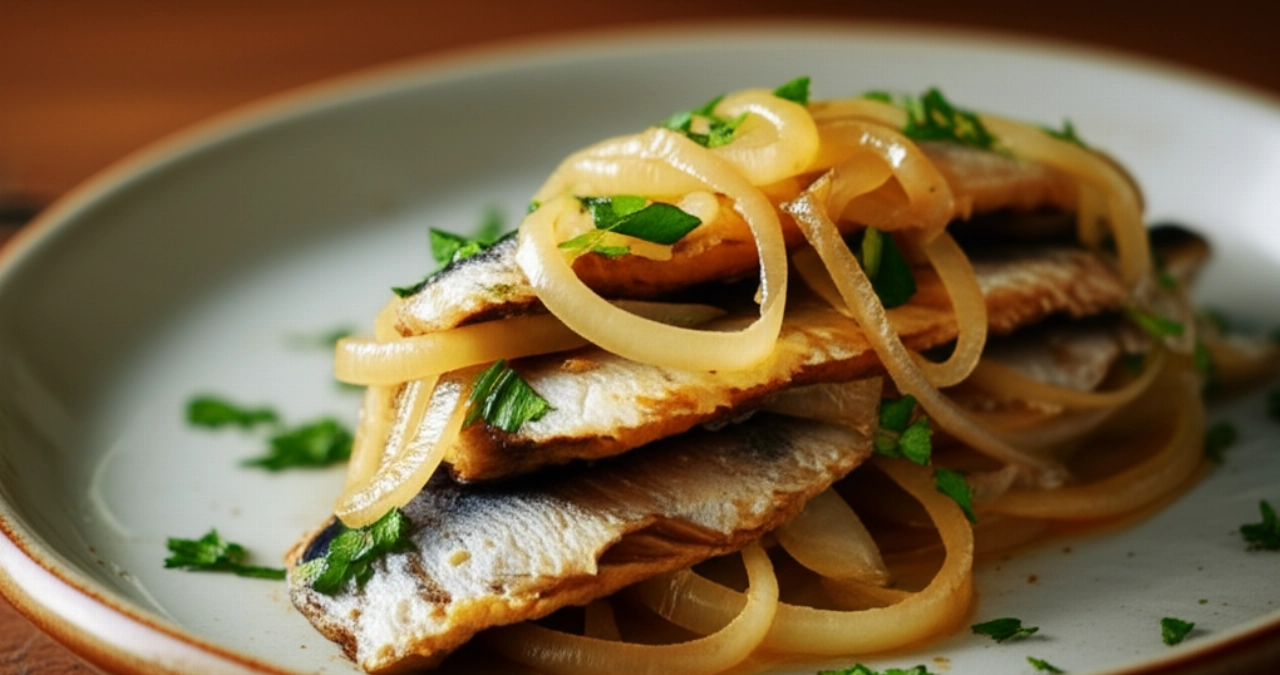
- Assemble the dish: In a glass or ceramic container (not metal, as vinegar might react), create a layer of saor (onions and seasoning). Place a layer of fried sardines on top. Continue to alternate layers of saor and sardines, finishing with a generous layer of saor.
- Cover and rest: Ensure the sardines are completely submerged in the saor. Cover the container with plastic wrap and refrigerate for at least 24 hours. Ideally, 48 hours, or even longer! This time is crucial for the flavors to meld and for the sardines to absorb the sweet and sour, becoming incredibly tender and flavorful.
Tips and Frequently Asked Questions about Sarde in Saor
Here are some of the questions I'm most often asked, to clear up any doubts and guarantee you a smashing success!
How long do Sarde in Saor keep?
Sarde in Saor are a preserving dish! If prepared correctly and stored in the refrigerator in an airtight container, completely submerged in their saor, they can easily last up to 4-5 days. In fact, I'll tell you more: they are even better on the second and third day, when the flavors have melded well.
Can I use other types of fish?
Certainly! Although the traditional recipe calls for sardines, saor also pairs very well with other small oily fish, such as anchovies or picarel. The principle is the same: fried fish then marinated in the sweet and sour onion mixture. The result will still be delicious!
How can I best serve them?
Sarde in Saor are a perfect appetizer, but they can also be an excellent light main course. Serve them at room temperature, accompanied by some slices of grilled or toasted polenta, or simply with good homemade bread to 'mop up' the saor. They are also ideal for a buffet or an aperitif.
Why did my sardines become soft in the saor?
This can happen if the sardines were not fried correctly (not crispy enough at first) or if they were left in the saor for too long without being completely submerged, exposing them to air. Always ensure they are well covered by the marinating liquid and that the initial frying is impeccable to maintain a good consistency.
A Masterpiece of Flavor and Tradition
There you have it! Now you no longer just have a recipe, but all the secrets to bring a dish to the table that tastes of home, tradition, and love. Your Sarde in Saor will be a triumph of flavors, a perfect balance that will conquer everyone, from the first taste.
Don't be afraid to experiment. Cooking is an act of creativity and generosity. But start from this solid and unfailing base, and you'll see that applause will not be lacking. It will be like taking a dip in the Venice Lagoon, with the intoxicating scent of onions and fresh fish.
Have you tried our recipe? We're very curious to see your masterpiece! Leave a comment below, tell us how it went, or share a photo on Instagram by tagging @SearchRecipes. If you loved these sardines, you can't miss our recipe for Italian Mixed Fry or for a perfect side dish like Caramelized Onions. Until next time, and bon appétit!